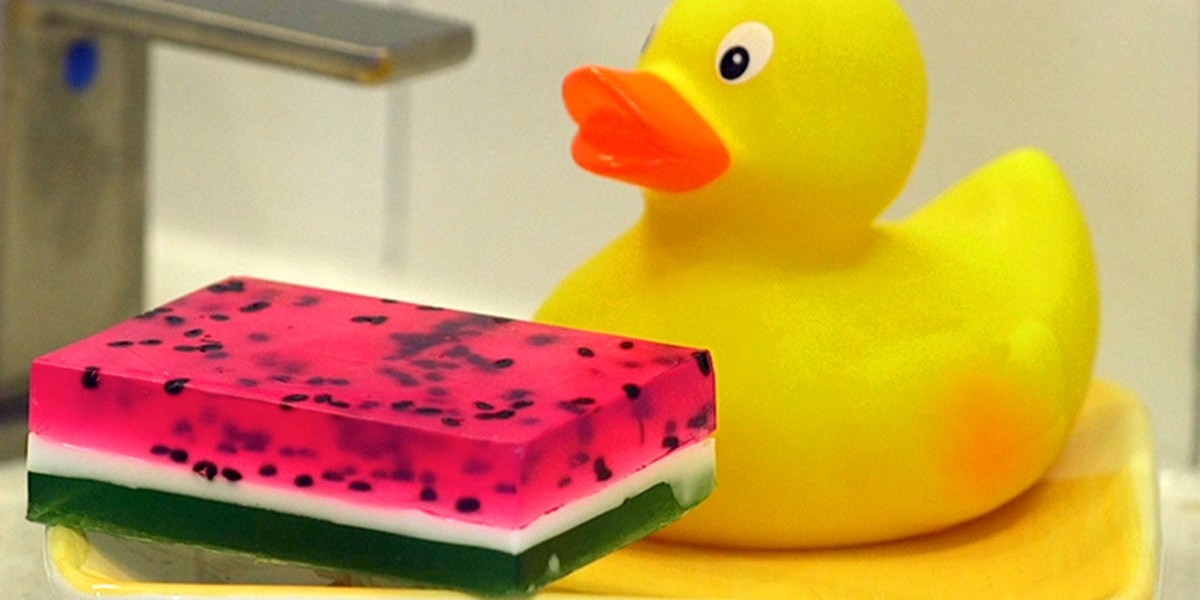
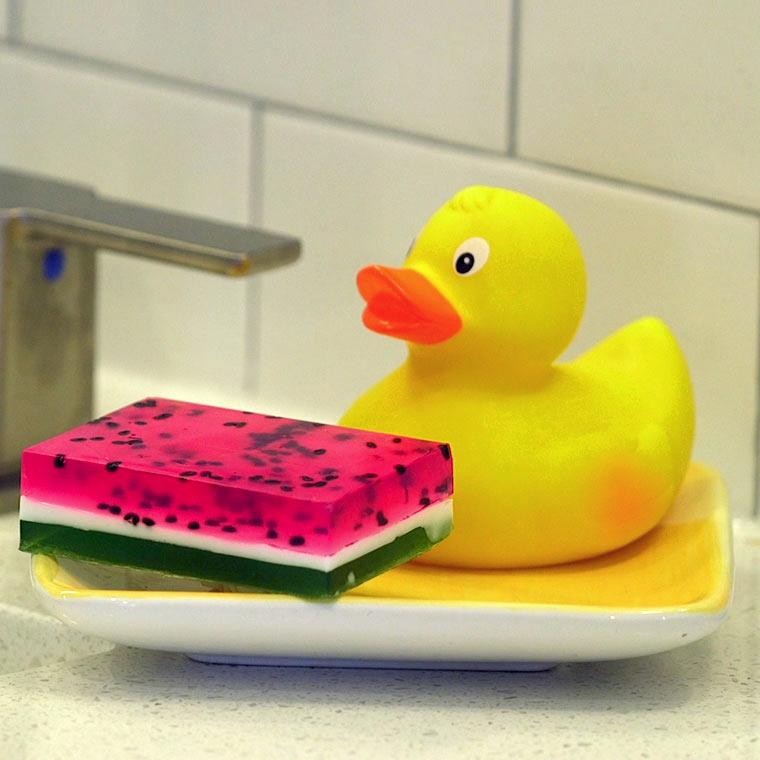
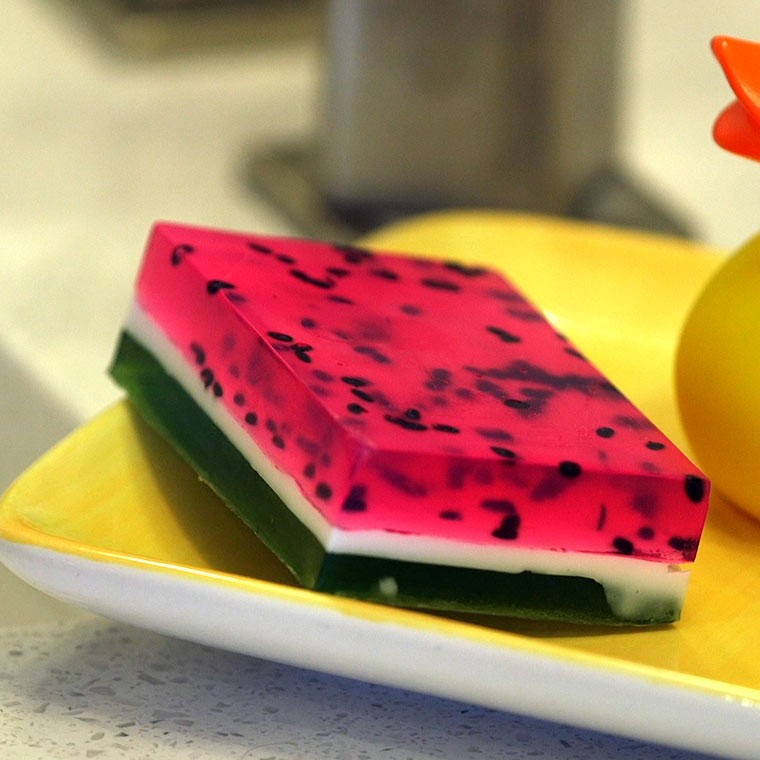
Making your own soap isn't as difficult as you think! These Watermelon Soaps are a fun and easy project you can do with your kids. The layers of red, white and green look so beautiful together and make these soaps a definite showstopper in your kitchen or bathroom.
You can find everything you need to make these soaps on Amazon or at your local craft store. Whip these up and have them on hand to give out as gifts at parties, showers or weddings, or simply keep them for yourself! There's no need to buy expensive soaps when you can make them at home - plus these adorable Watermelon Soaps will make washing up so much fun.
Materials Needed:
- Soap Mold
- 1/2 Cup Shea Butter Soap
- 2 1/2 Cups Clear Soap
- Colorant (Red and Green)
- Black Sesame Seeds
- Essential Oils of Your Choice
Directions:
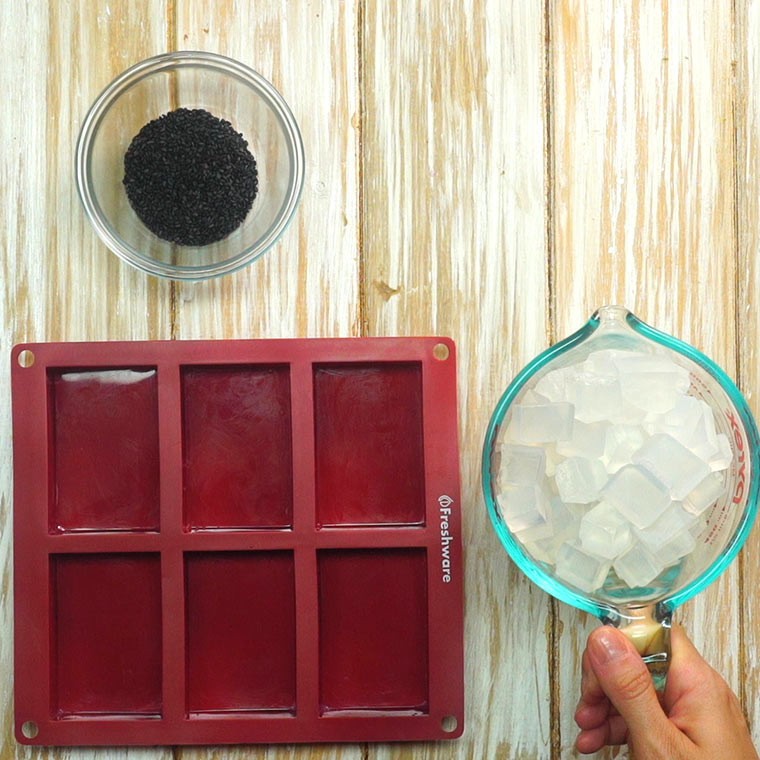
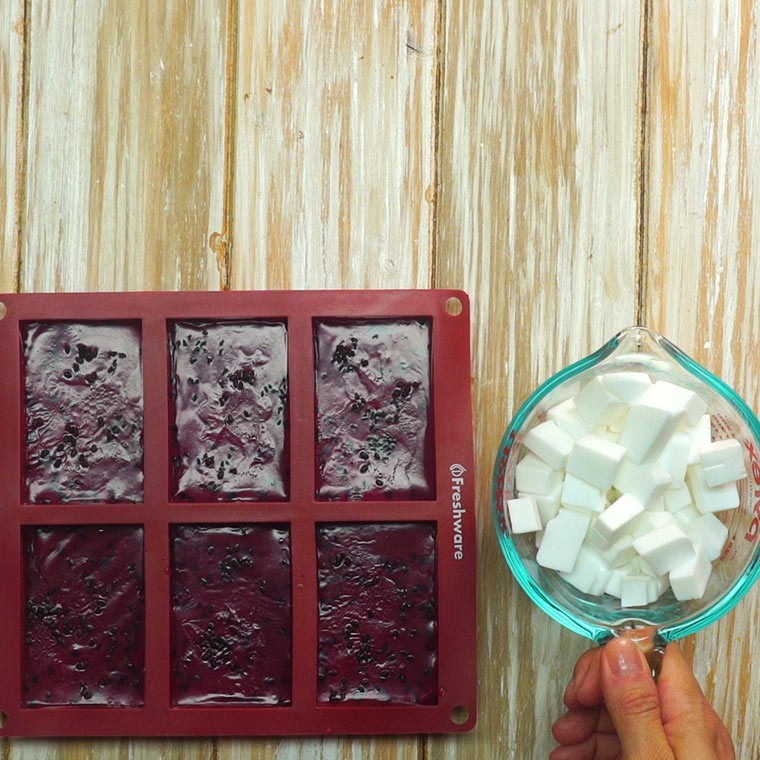
Use a knife to cut off a few cubes of the clear soap and place in a microwave safe dish. The exact measurement of soap with change depending on the size of the soap mold you're using. For this layer we used about 2 cups.
Place your soap mold on a flat surface that won't be disturbed. You don't want to move the mold around before the soap is solid because it will slosh on the sides and won't look as nice.
Carefully place a few black sesame seeds sporadically in your molds. These are supposed to be seeds so just a few is fine.
Heat your soap base in the microwave for 30 second intervals until melted. Stir between each interval.
Once it is melted add a few drops of red colorant and stir well - adding one drop at a time until you get the correct shade of red. You can also add any essential oils or fragrances at this point.
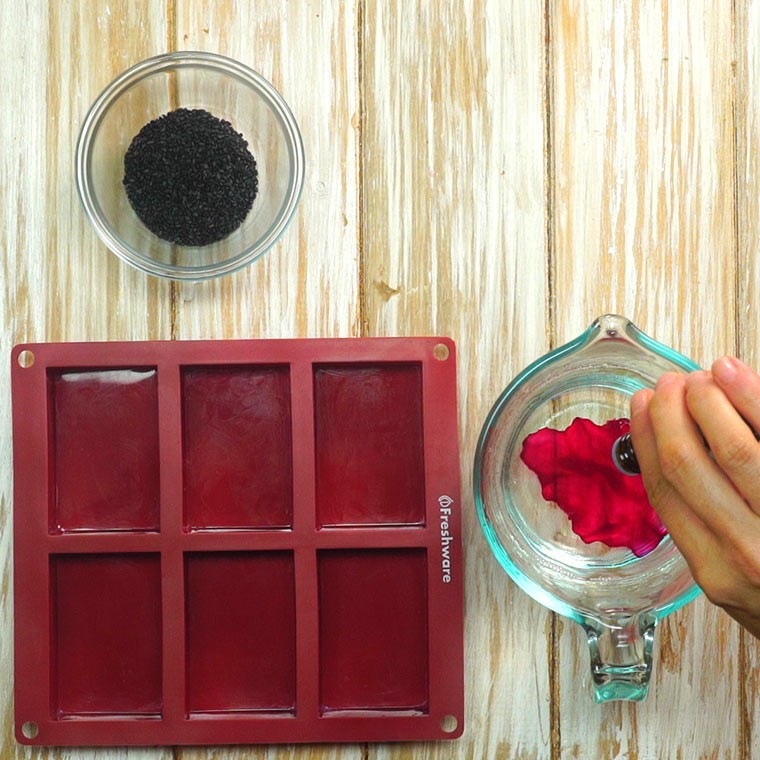
Carefully pour the red mixture into the soap mold- about 40% of the way up the side.
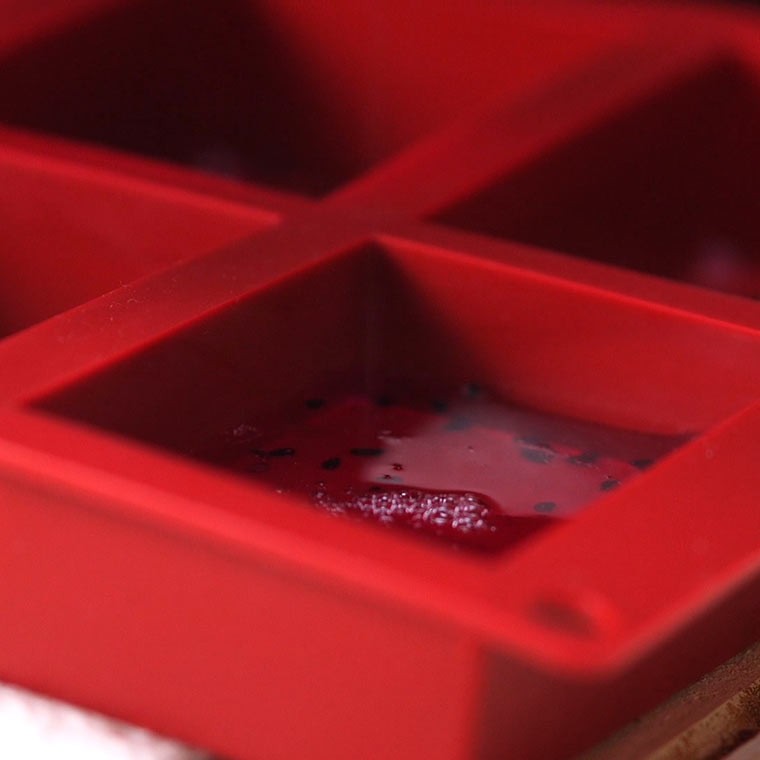
Sprinkle a few more sesame seeds conservatively into the red soap base. Do this quickly before the soap starts to harden.
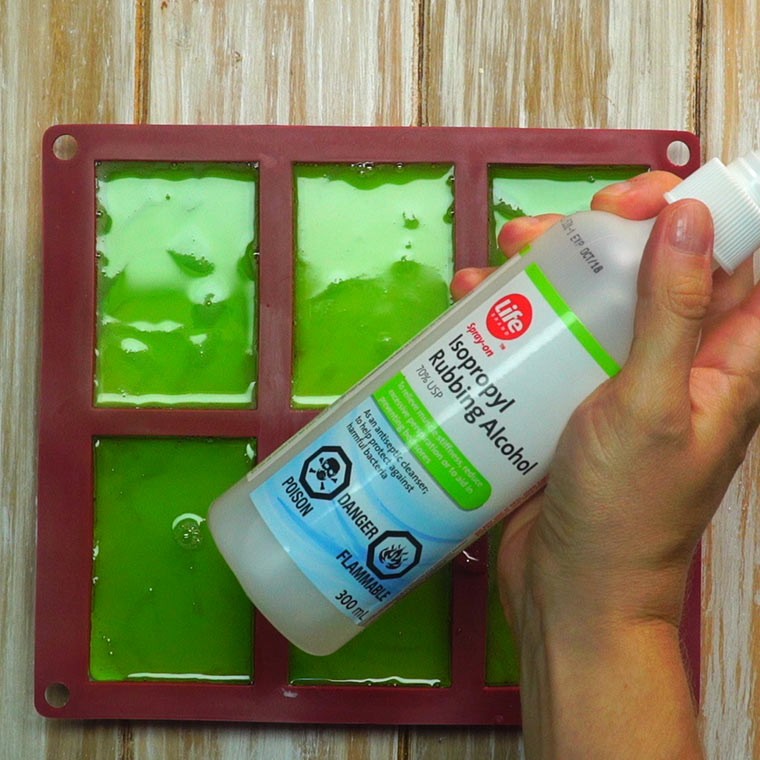
If you find bubbles as you pour the soap base, you can fill a spray bottle with rubbing alcohol and spritz lightly on the surface of the soap. The bubbles will immediately pop.
Now set aside for about an hour to set. You don't want the soap to be wiggly consistency (like Jello) before you start the next layer or the layers will blend together. You really do want to be sure it is fairly solid on top.
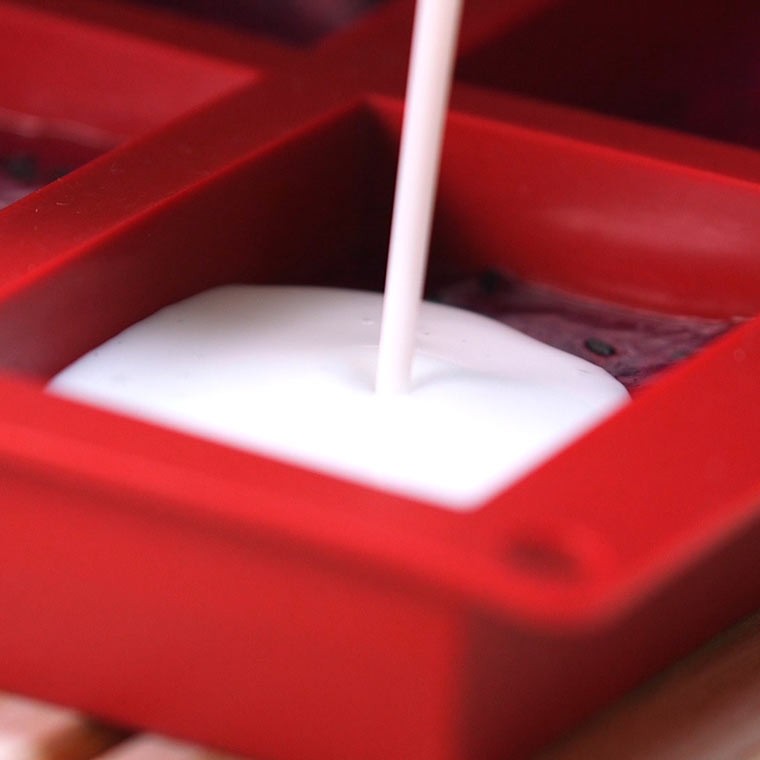
Now melt the shea soap. This is a thinner layer so you don't need much. We used about 1/2 cup.
Poor on top of the red layer and let cool for about an hour.
Finally melt a bit of clear soap (we used 1/2 cup) and add drops of green until you get your desired shade. Also add essential oils at this point if you like.
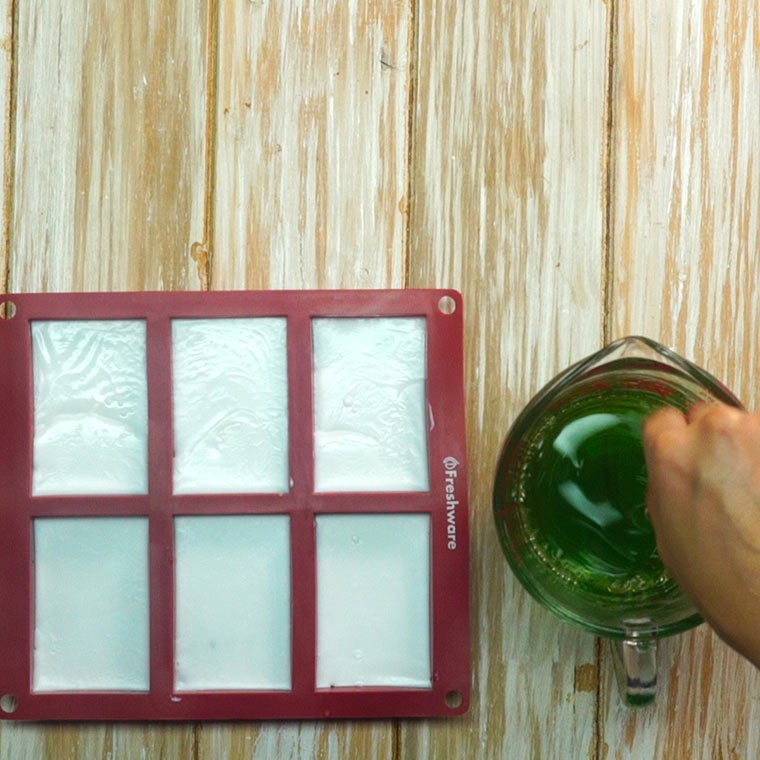
Pour the green soap on top of the white layer and let cool.
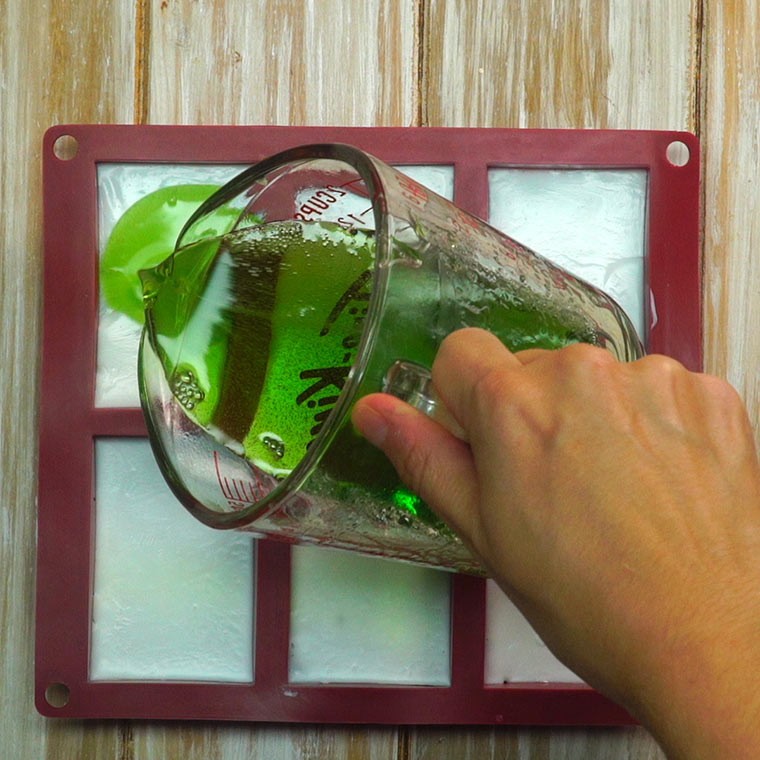
Once again, if you see any bubbles forming on the soap spray with rubbing alcohol.
Now your soap is ready to use!