
I recently moved into a house that has a lot of gardens and space for plants. Don't get me wrong, this is great especially in the summertime, but I've noticed that costs for upkeep and garden decor can get really expensive very quickly.
Luckily there are fun DIYs that you can do at home that are cheap, easy and actually make a finished product you're happy to show off. These Marbled Terra Cotta Pots are so beautiful and unique, and look great in your yard or inside your home.
Choose any size of terra cotta pots that you like, just make sure that you have enough paint and a container big enough to dip your pots into. We haven't tried this yet, but you could marble the matching clay saucers to go with your pots to make a cute matching set.
Now, I feel like you might be worried that you need some kind of artistic talent to make these pots. Trust me, you don't! If you can pour paint into a container, you're basically good to go.
Something I noticed when making these is that you have to be mindful of how much water you add to the paint. Too much water will make the paint watery and the colors won't show up as vibrantly on the pots. It's not rocket science, but it could take some testing to get it right for the paint you're using.
Scroll down to see how to make this beautiful marbled pots.
Looking for more fun garden DIYs? Check these ones out!
Kitchen Colander Plant Holders
Start by selecting the paint colors you want to use. Make sure to choose acrylic paint! For our pots we did white as our base with three different shades of blue.
Mix the white acrylic paint with 1 part water and pour into a container big enough for dipping your pot into.
You're going to add 1 part water to all your other paint colors and pour each into a small disposable container (like a plastic cup).
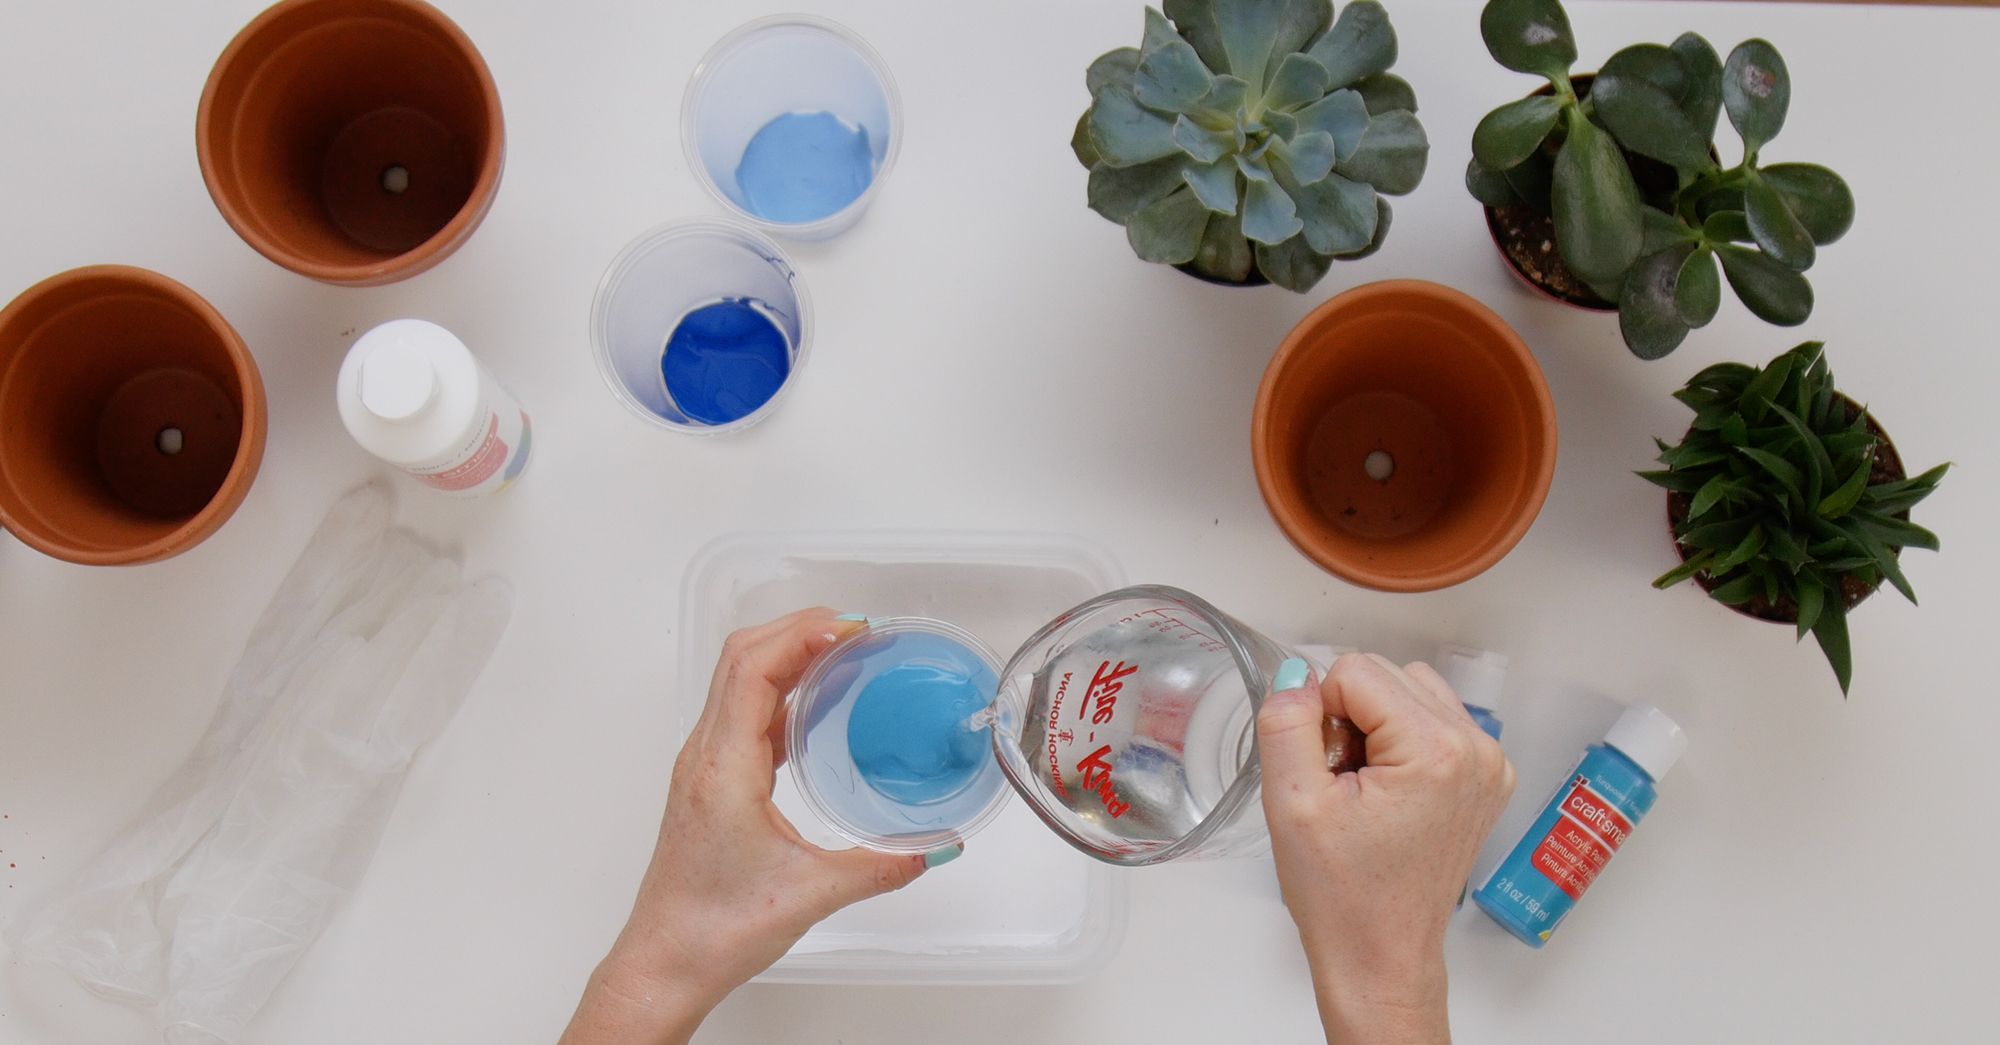
Once you've watered down your paint it's time to add your colors to your white paint. Either use a paintbrush to splash paint into the white, or carefully pour the paint into the white.

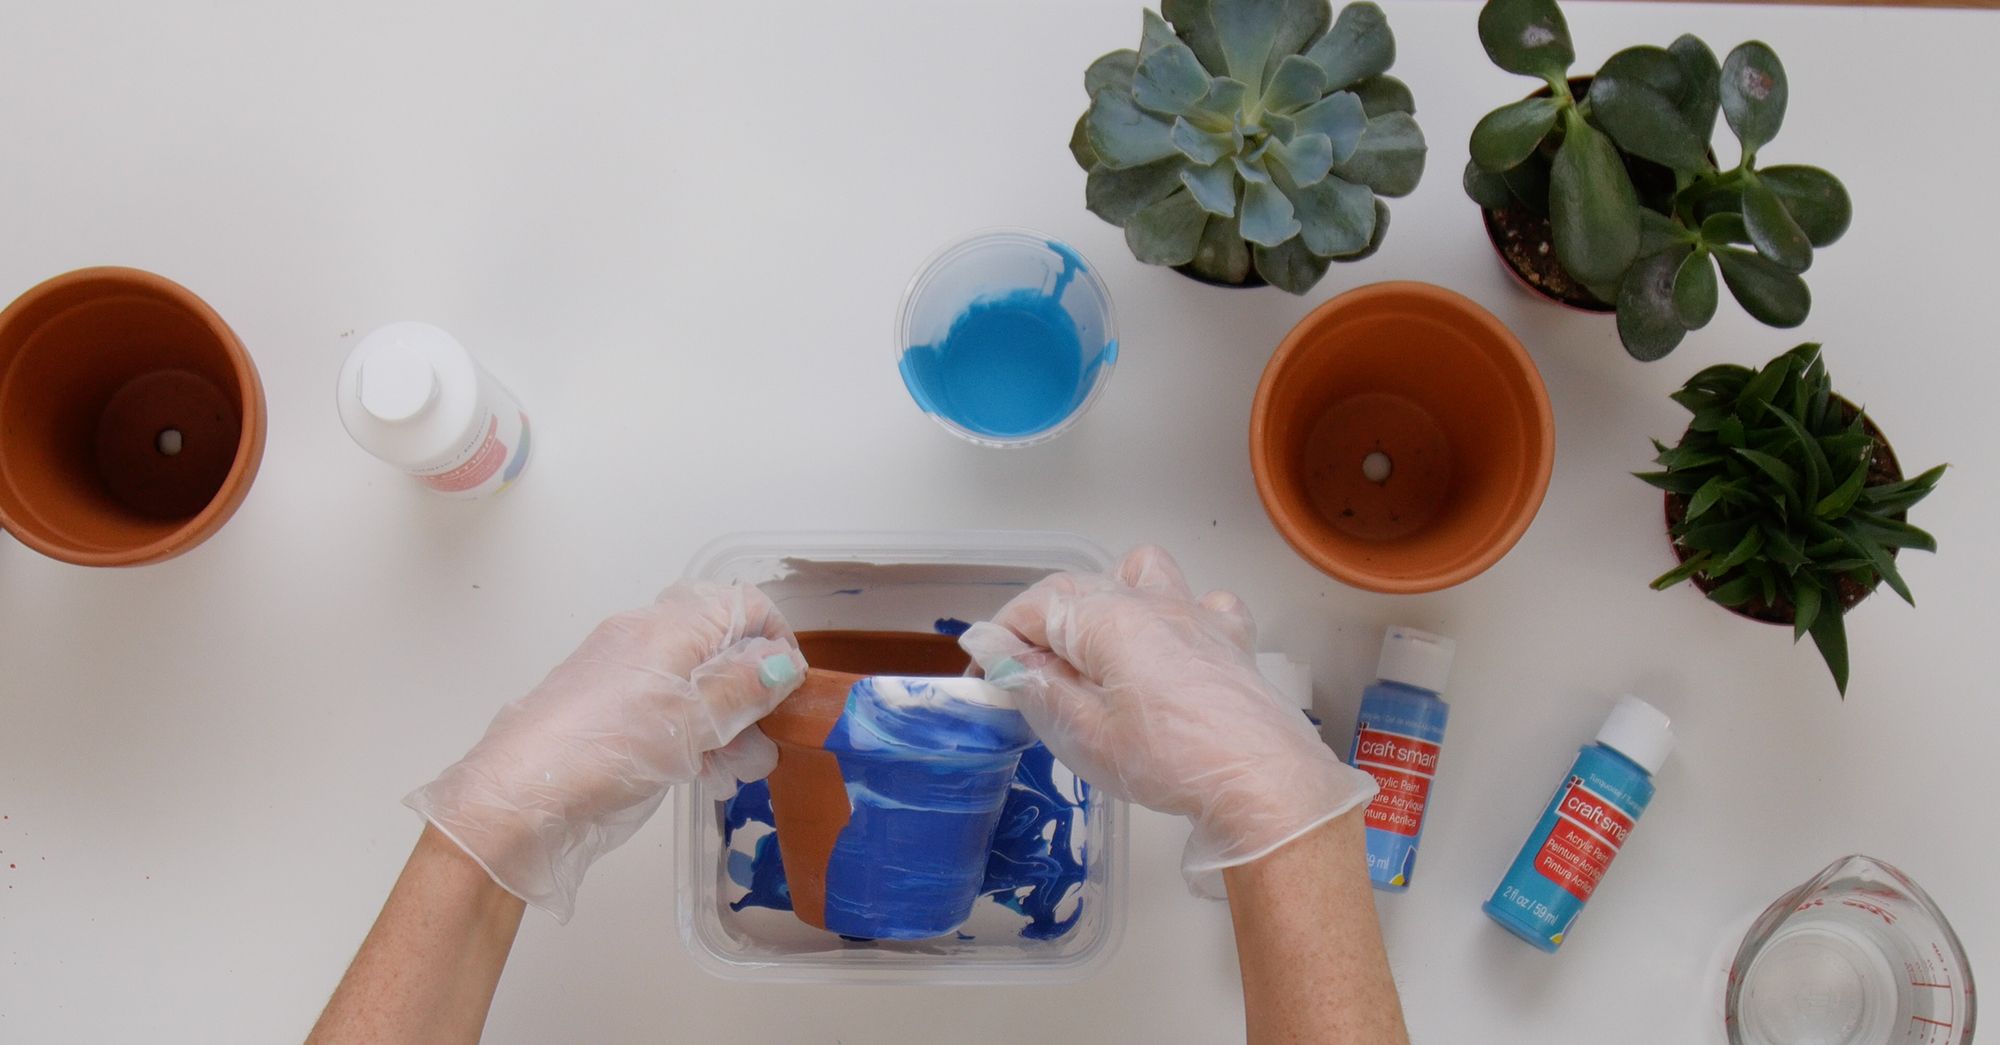
At this point you can use a toothpick or popsicle to drag through the colors and add additional patterns to your paint. You don't want to mix the colors together completely.

Now it's time to dip! Put on a pair of disposable gloves (this part is messy!) and slowly dip your pot into the paint. Roll the pot in the paint so that all the sides are covered.
Once it's covered, remove and allow the paint to drip off. Move the pot to a plastic sheet to dry, top-side down.
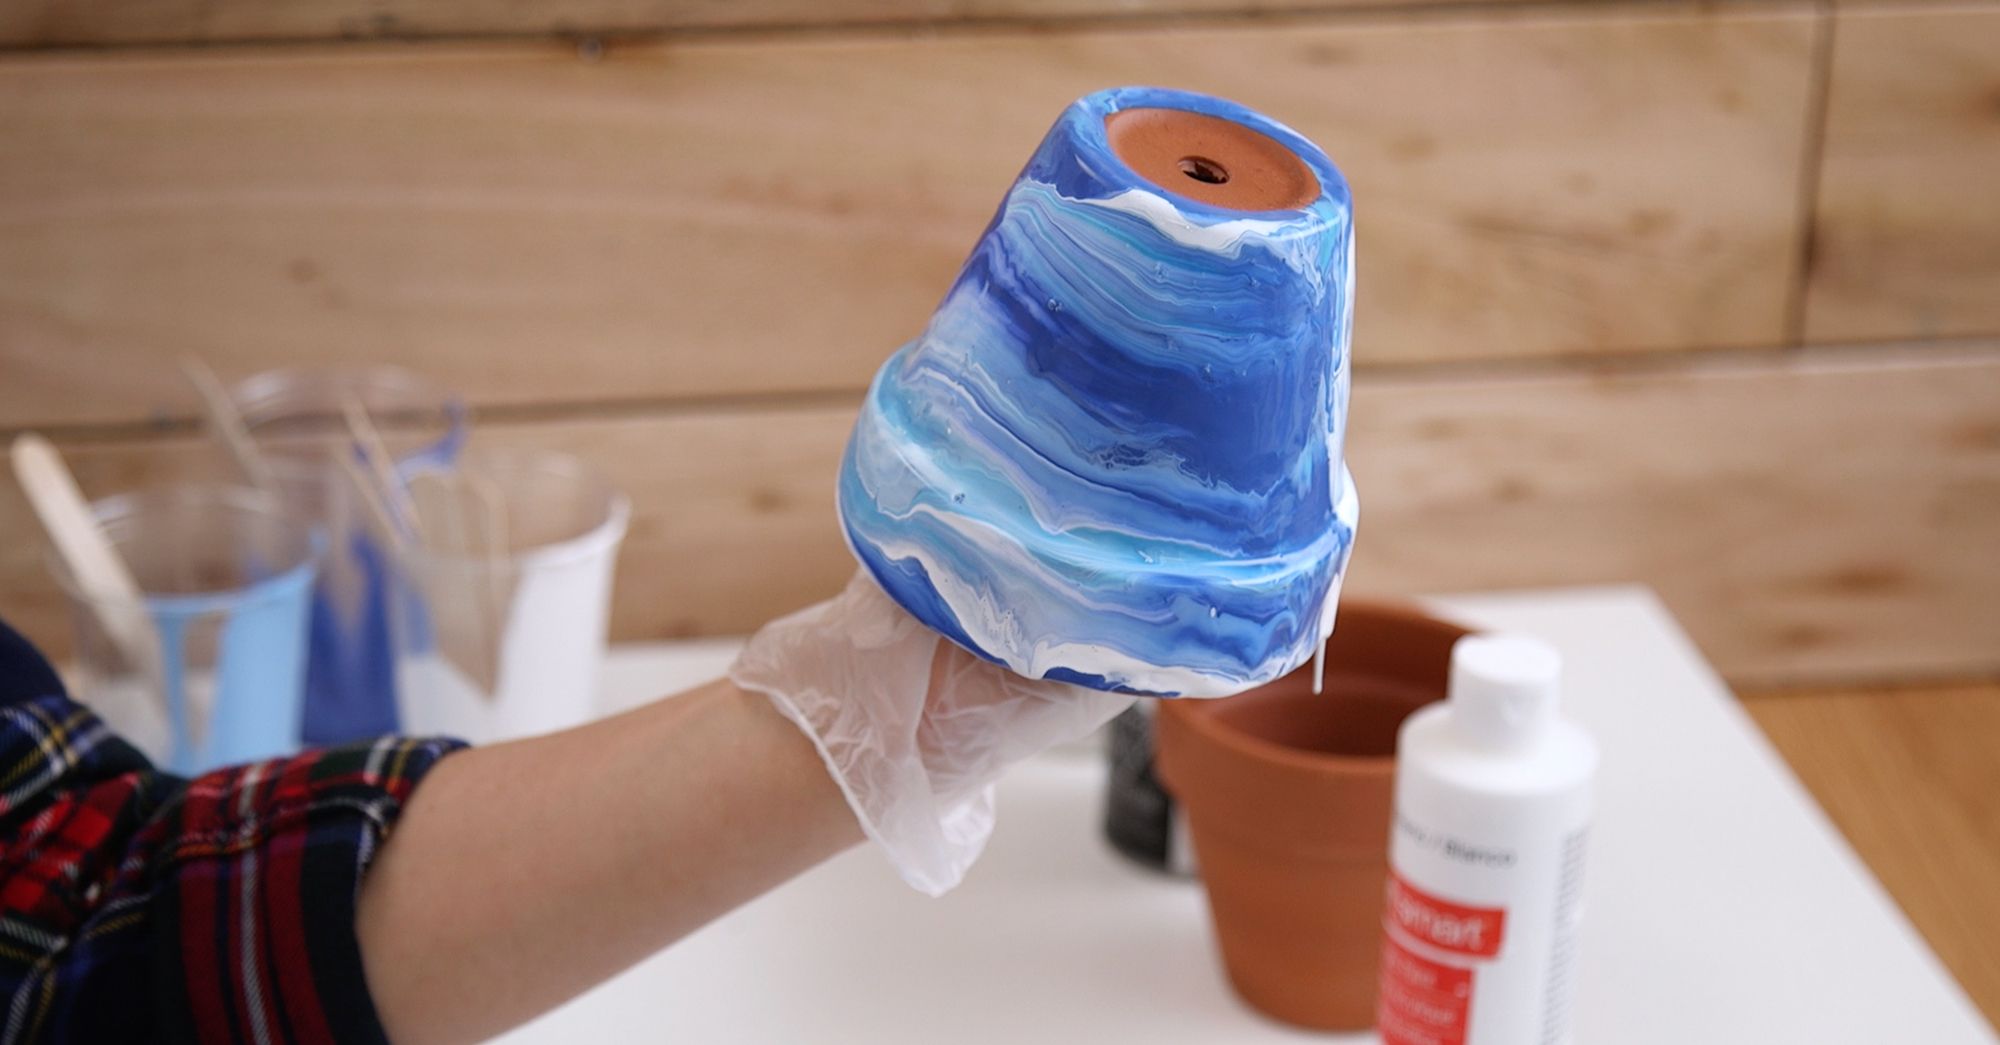
Once dry, spray with a clear finishing spray or acrylic varnish. Do a few coats!
Now your pots are dry and ready to be new homes for your favorite plants!
See below for the easy-to-read directions on how to make these Marbled Terra Cotta Pots.
Materials
- Acrylic paint (white + at least 2 accent colors)
- Disposable container big enough to fit pot
- Disposable jars for paint
- Water
- Toothpick or popsicle stick
- Paint brush
- Pot (terra cotta, or clay)
- Plastic drop cloth
- Varnish or Clear spray paint
Directions
- Start by selecting the paint colors you want to use.
- Mix the white acrylic paint with 1 part water and pour into a container big enough for dipping your pot into.
- You're going to add 1 part water to all your other paint colors and pour each into a small disposable container (like a plastic cup).
- Once you've watered down your paint it's time to add your colors to your white paint. Either use a paintbrush to splash paint into the white, or carefully pour the paint into the white.
- At this point you can use a toothpick or popsicle to drag through the colors and add additional patterns to your paint. You don't want to mix the colors together completely.
- Now it's time to dip! Put on a pair of disposable gloves (this part is messy!) and slowly dip your pot into the paint. Roll the pot in the paint so that all the sides are covered.
- Once it's covered, remove and allow the paint to drip off. Move the pot to a plastic sheet to dry, top-side down.
- Once dry, spray with a clear finishing spray or acrylic varnish. Do a few coats of this clear spray to fully protect the paint color.
Now your pots are ready to be displayed around your home and in your garden!
Do you know someone who loves gardening DIYs? Make sure to share this project with them!
Watch our video below that shows how we made our Marbled Terra Cotta Pots.
