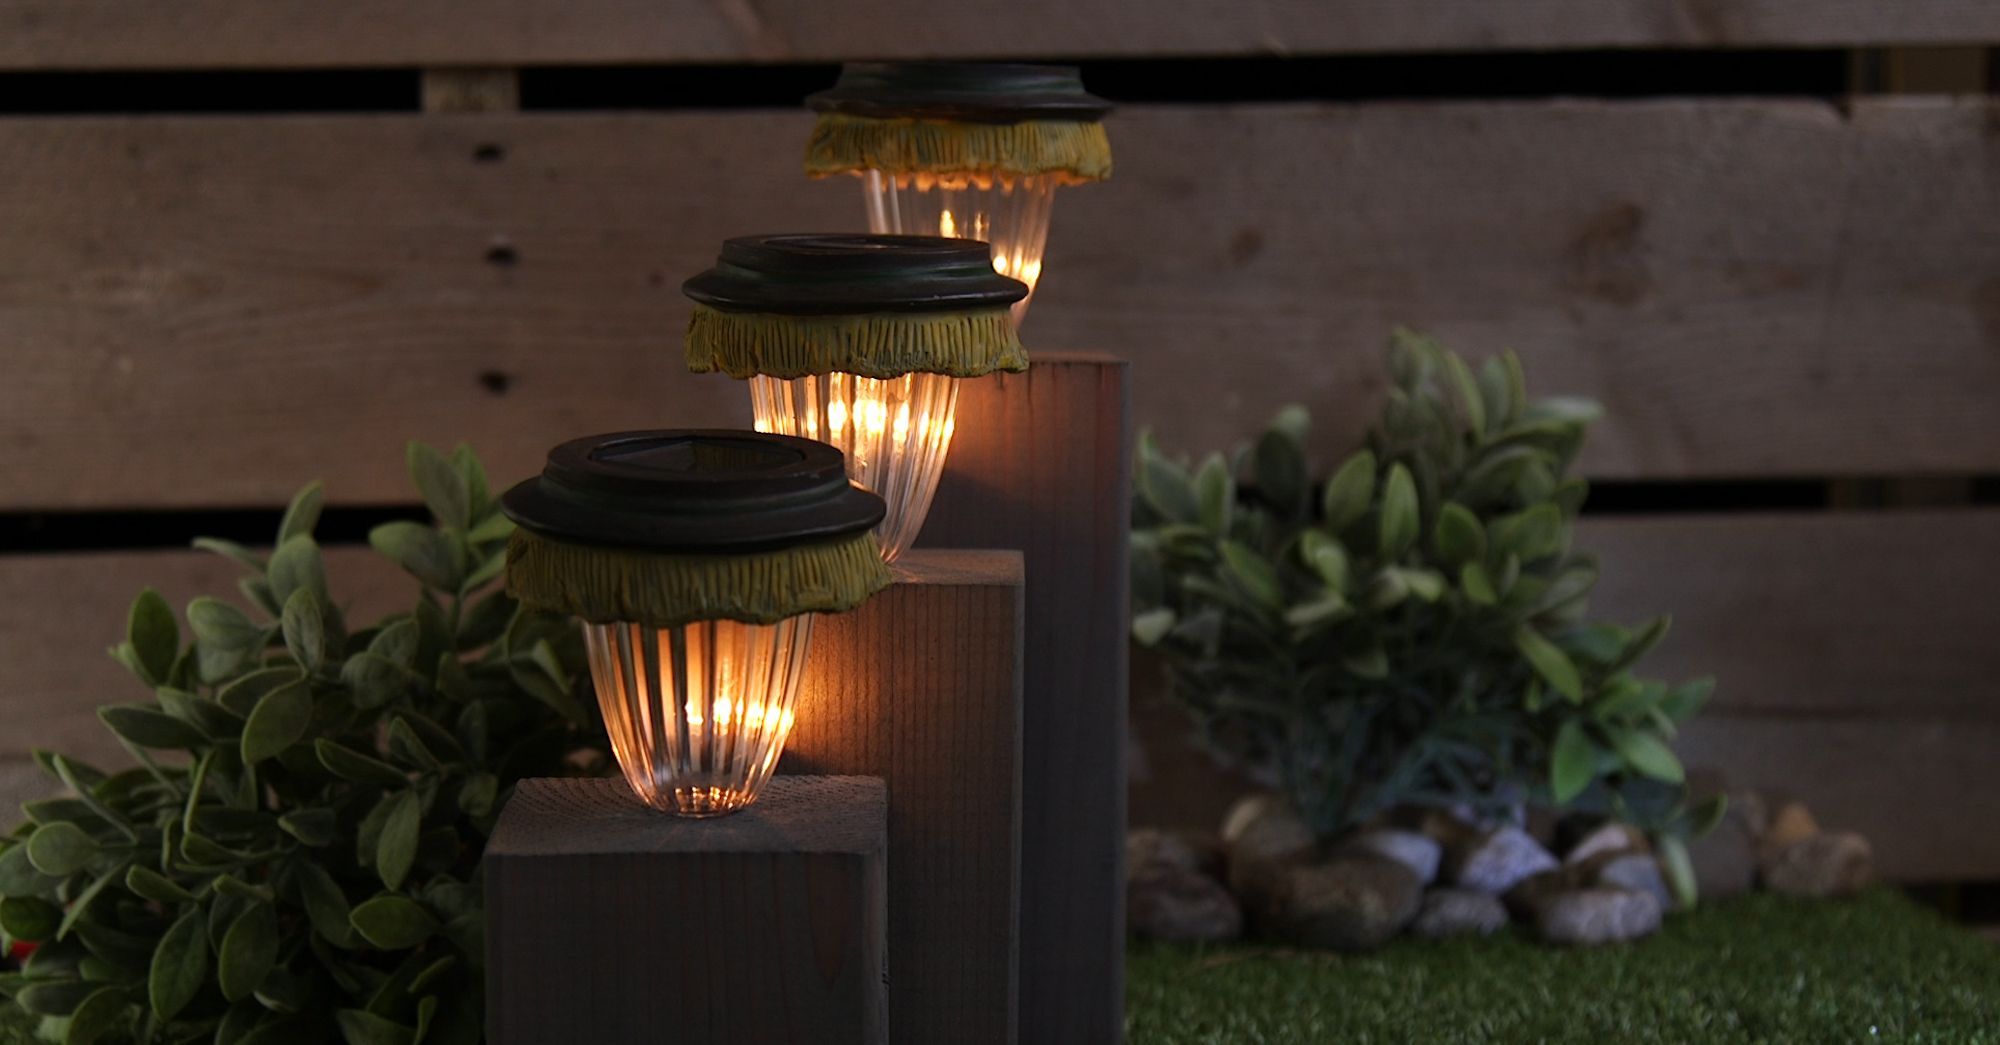
Are you looking to add a little something something to your backyard this summer? If so, these cedar block landscape lights are just thing, and the best part is that you can make them yourself so you don't have to pay a fortune!
All you need is some wood, a handyman to help with cutting, some dollar store solar lights, stain, and hot glue! Make as many as you want and then display them throughout your backyard for a magical night time glow!
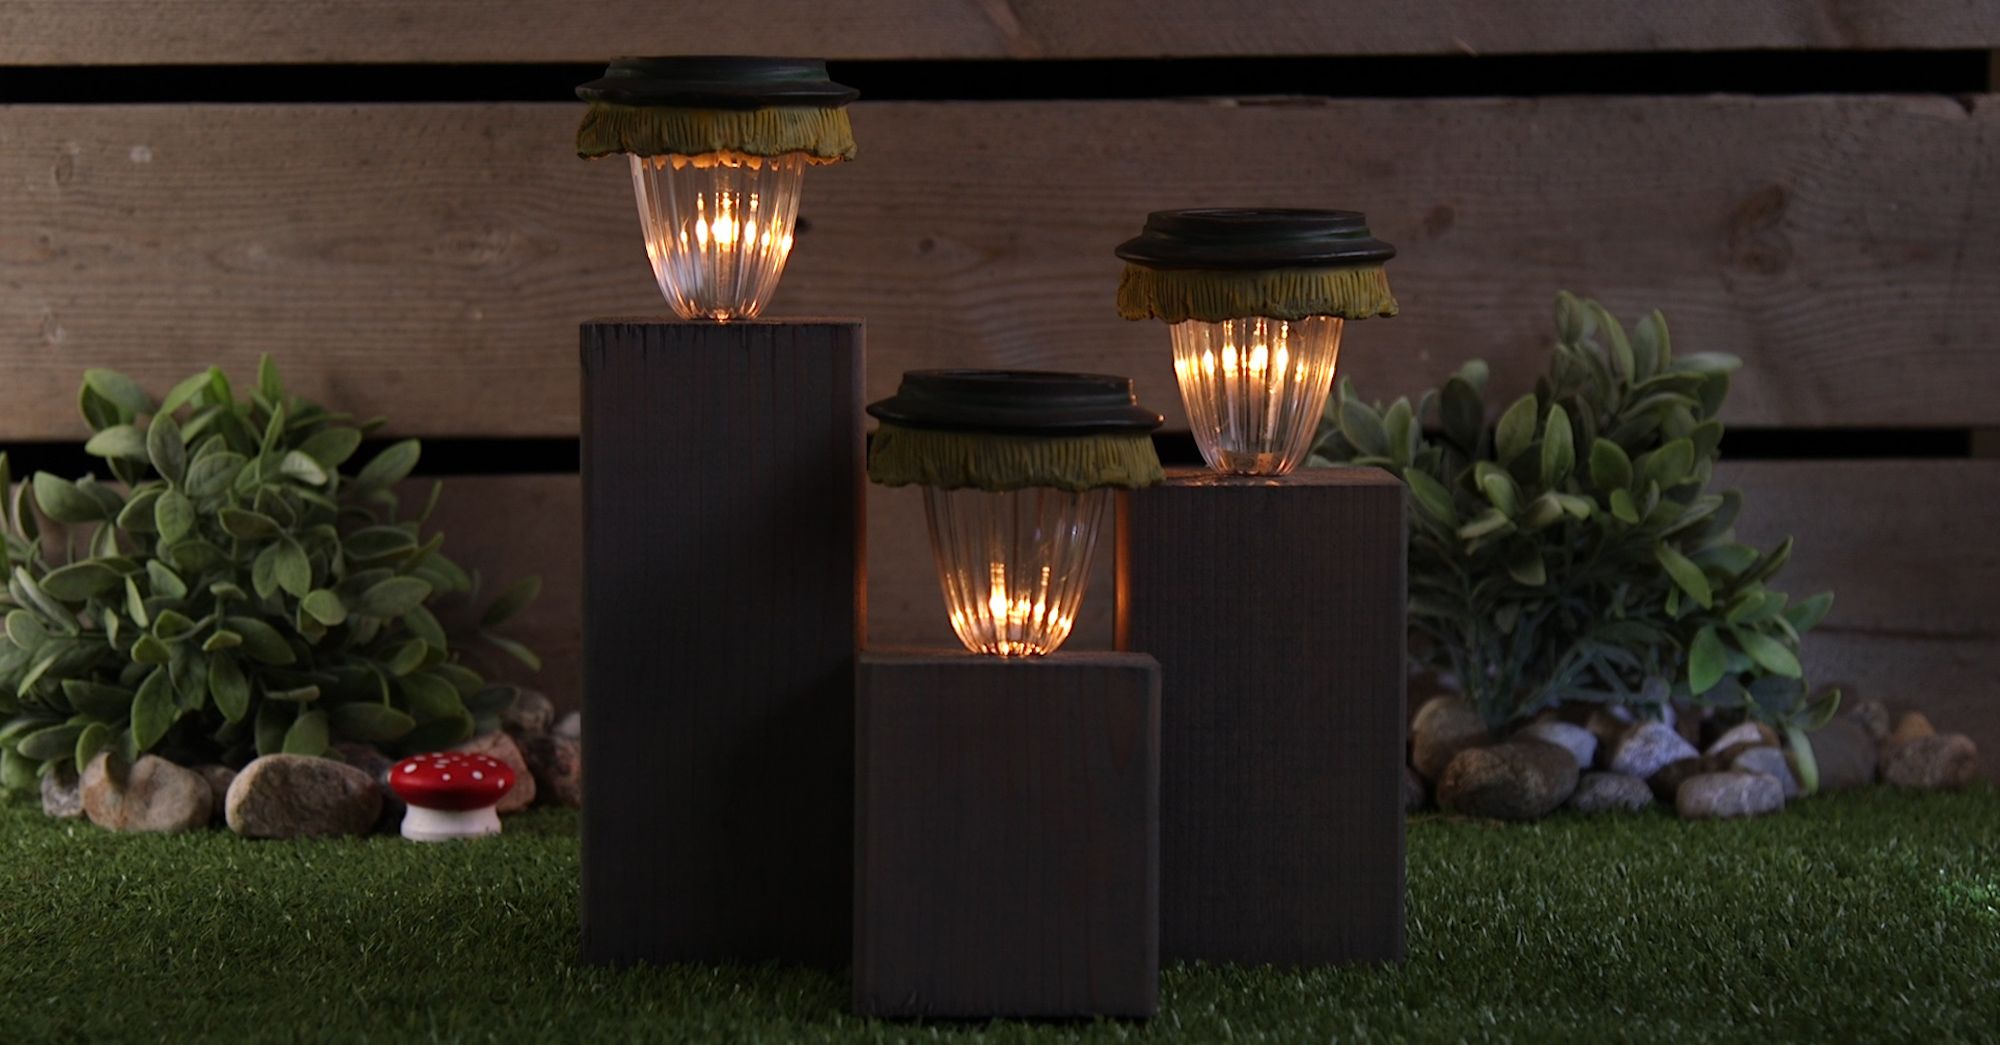
Ever since I made these for my own backyard I've gotten so many compliments! It just makes that atmosphere of sitting back there that much more enjoyable.
Use them to create a pathway or simply stick them in random places throughout your yard. No need to have to worry about remembering to turn the lights off when your done, with these solar lights it's as easy as placing and forgetting.
Other fun crafts to do this summer:
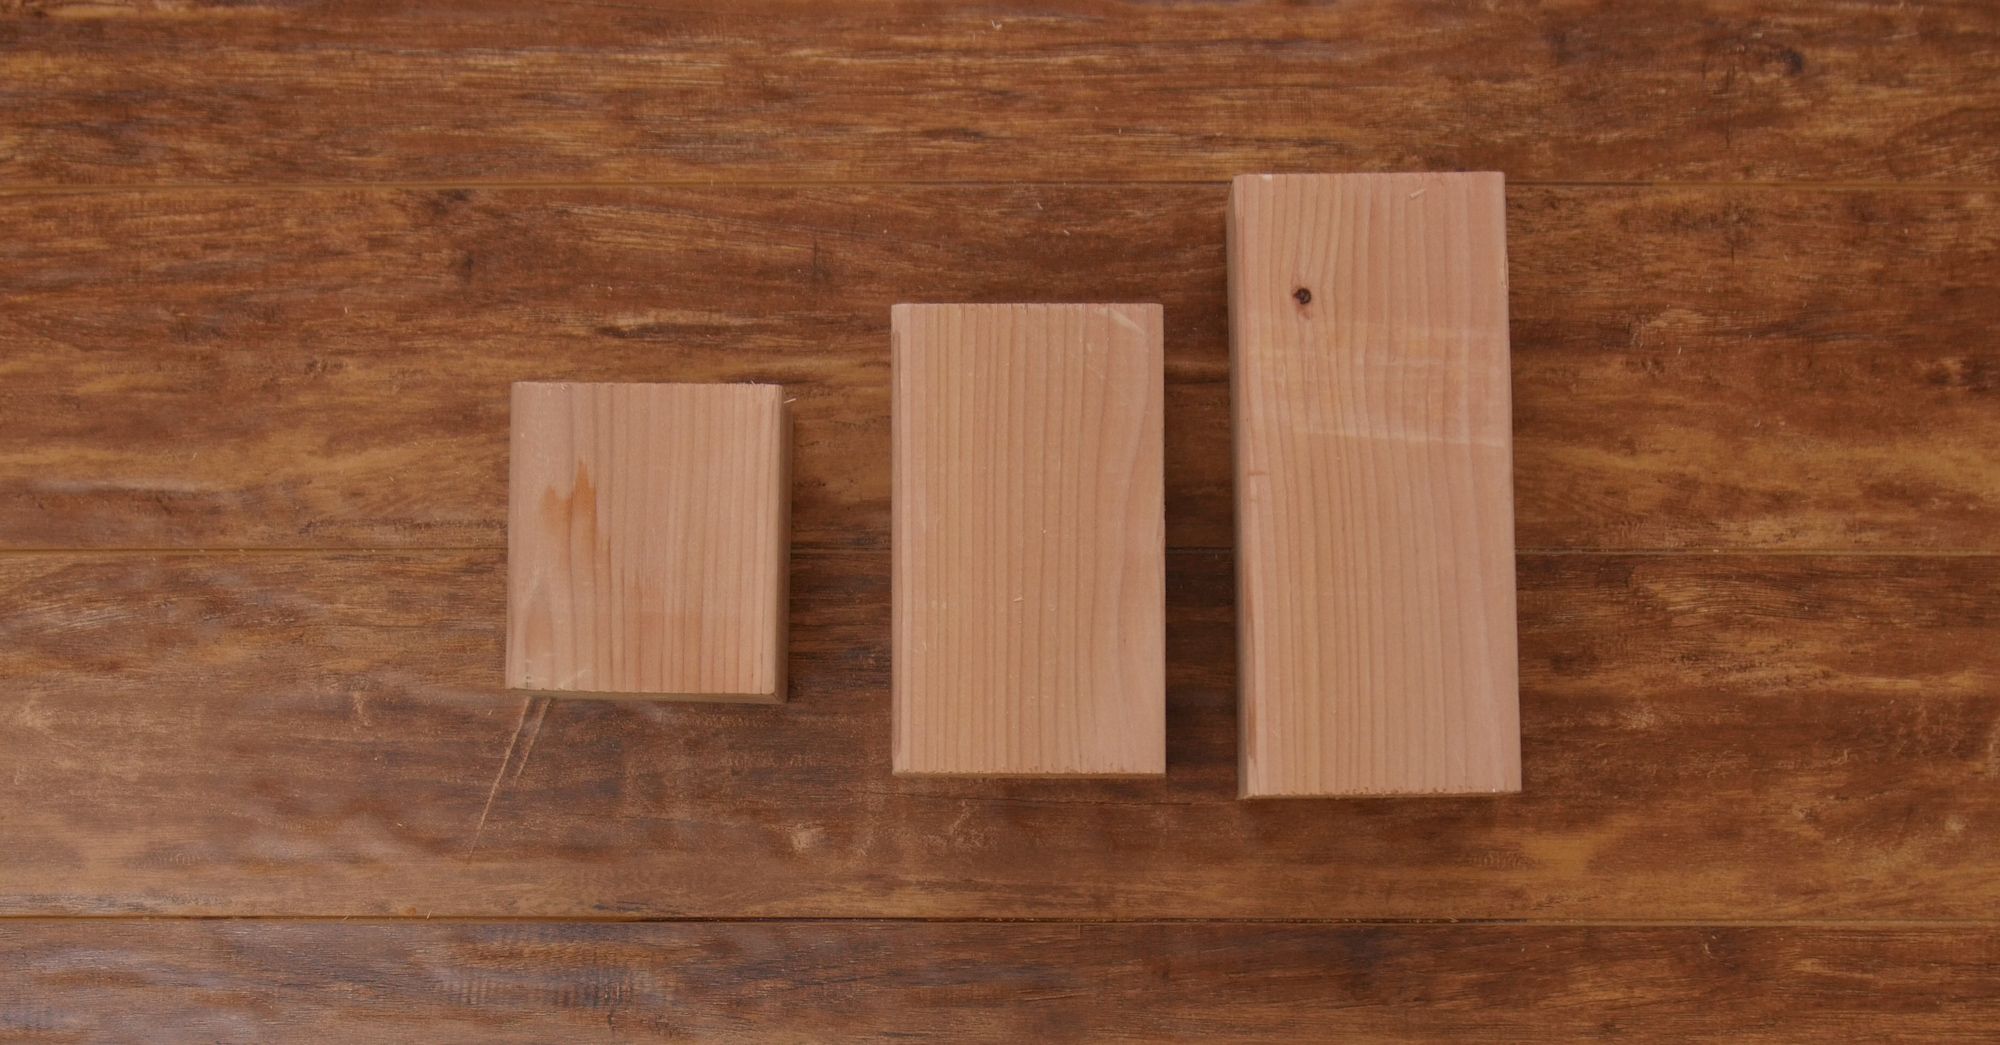
1. Start by measuring out your 4x4 post into three sections, 4", 6", and 8". Than using a table saw cut out the measures sections so that you are left with 3 blocks.
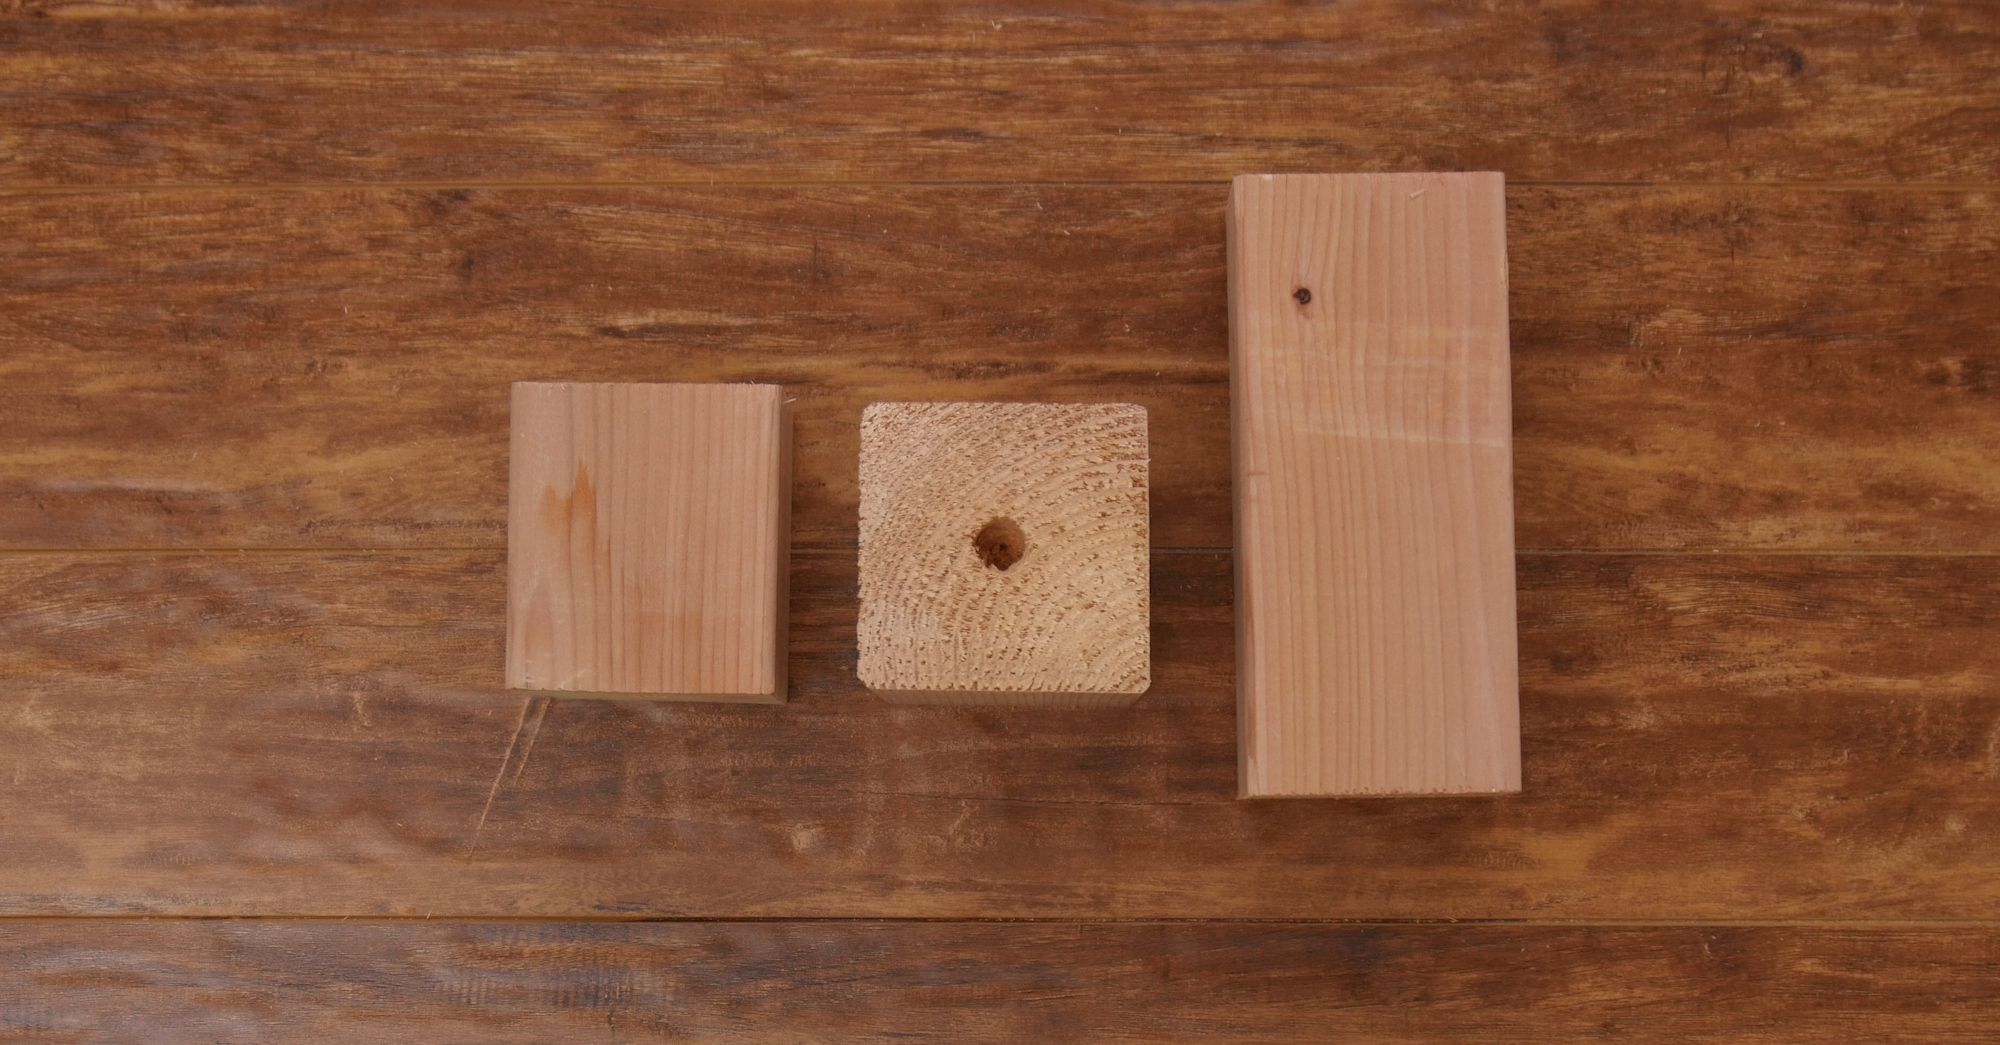
2. Next create an "X" on the end of each of the blocks. The center of the "X" is where you will make your drill bit mark that will be used to hold the solar light in place (you will need to drill the hole based on the size of your solar light).
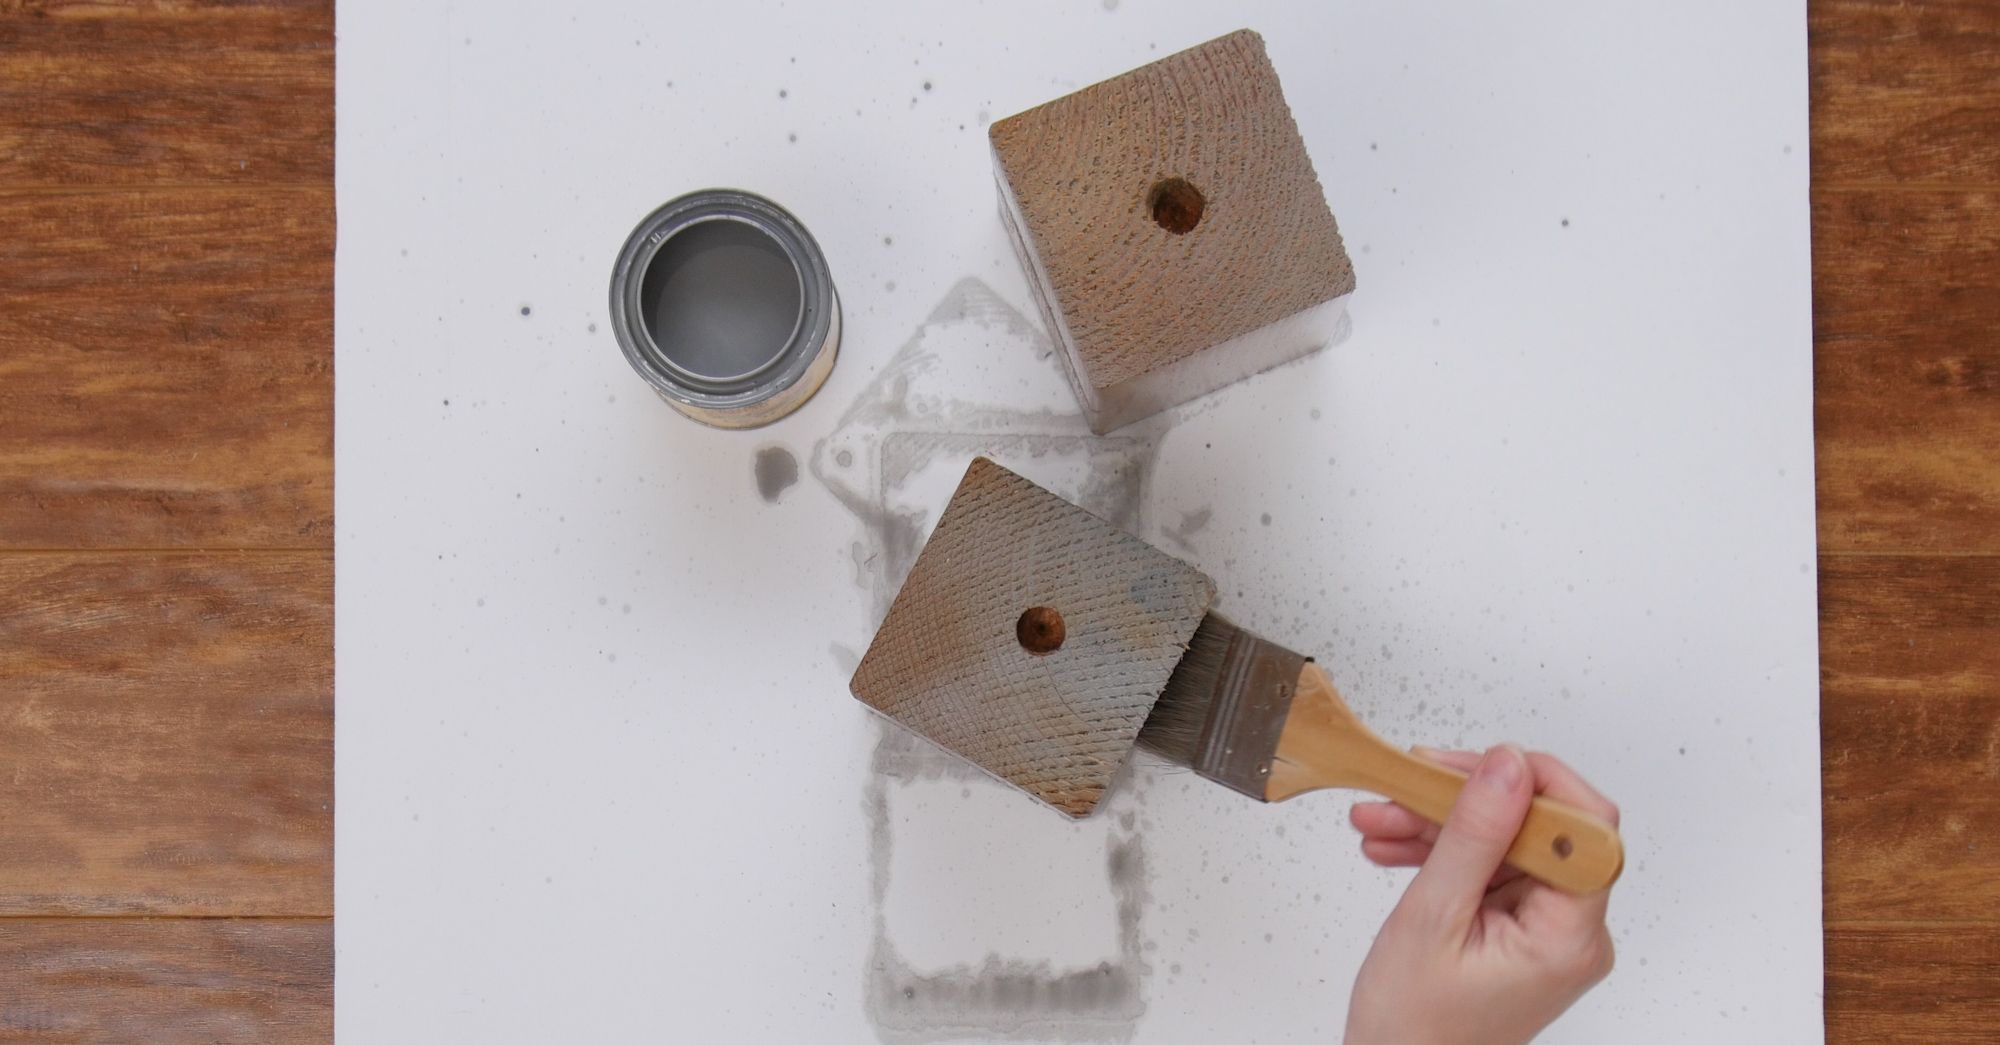
3. Once you have your blocks ready, it's time to stain them and then allow them to dry.
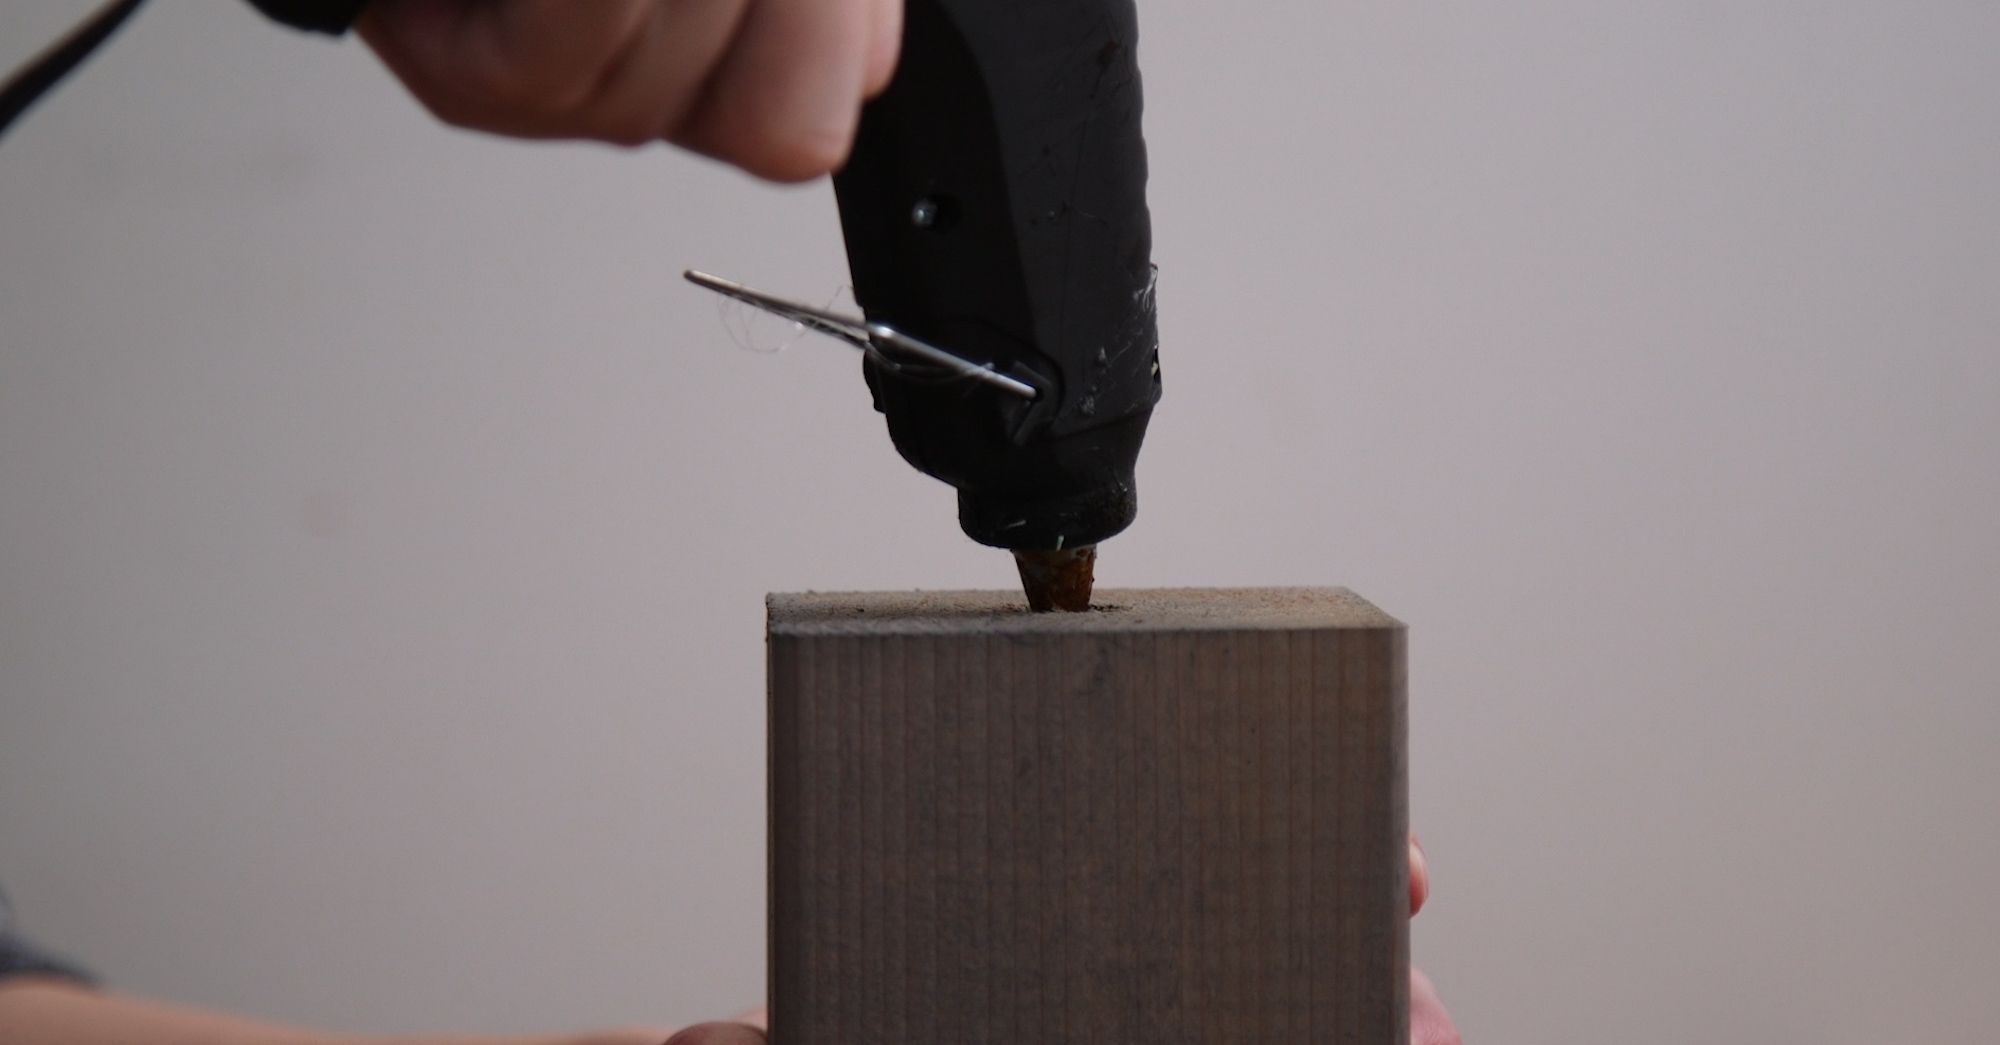
4. After ensuring the blocks are dry, heat up your glue gun and apply a generous amount inside the drill bit hole, and then stick your solar light inside it (removing the base of the light first).
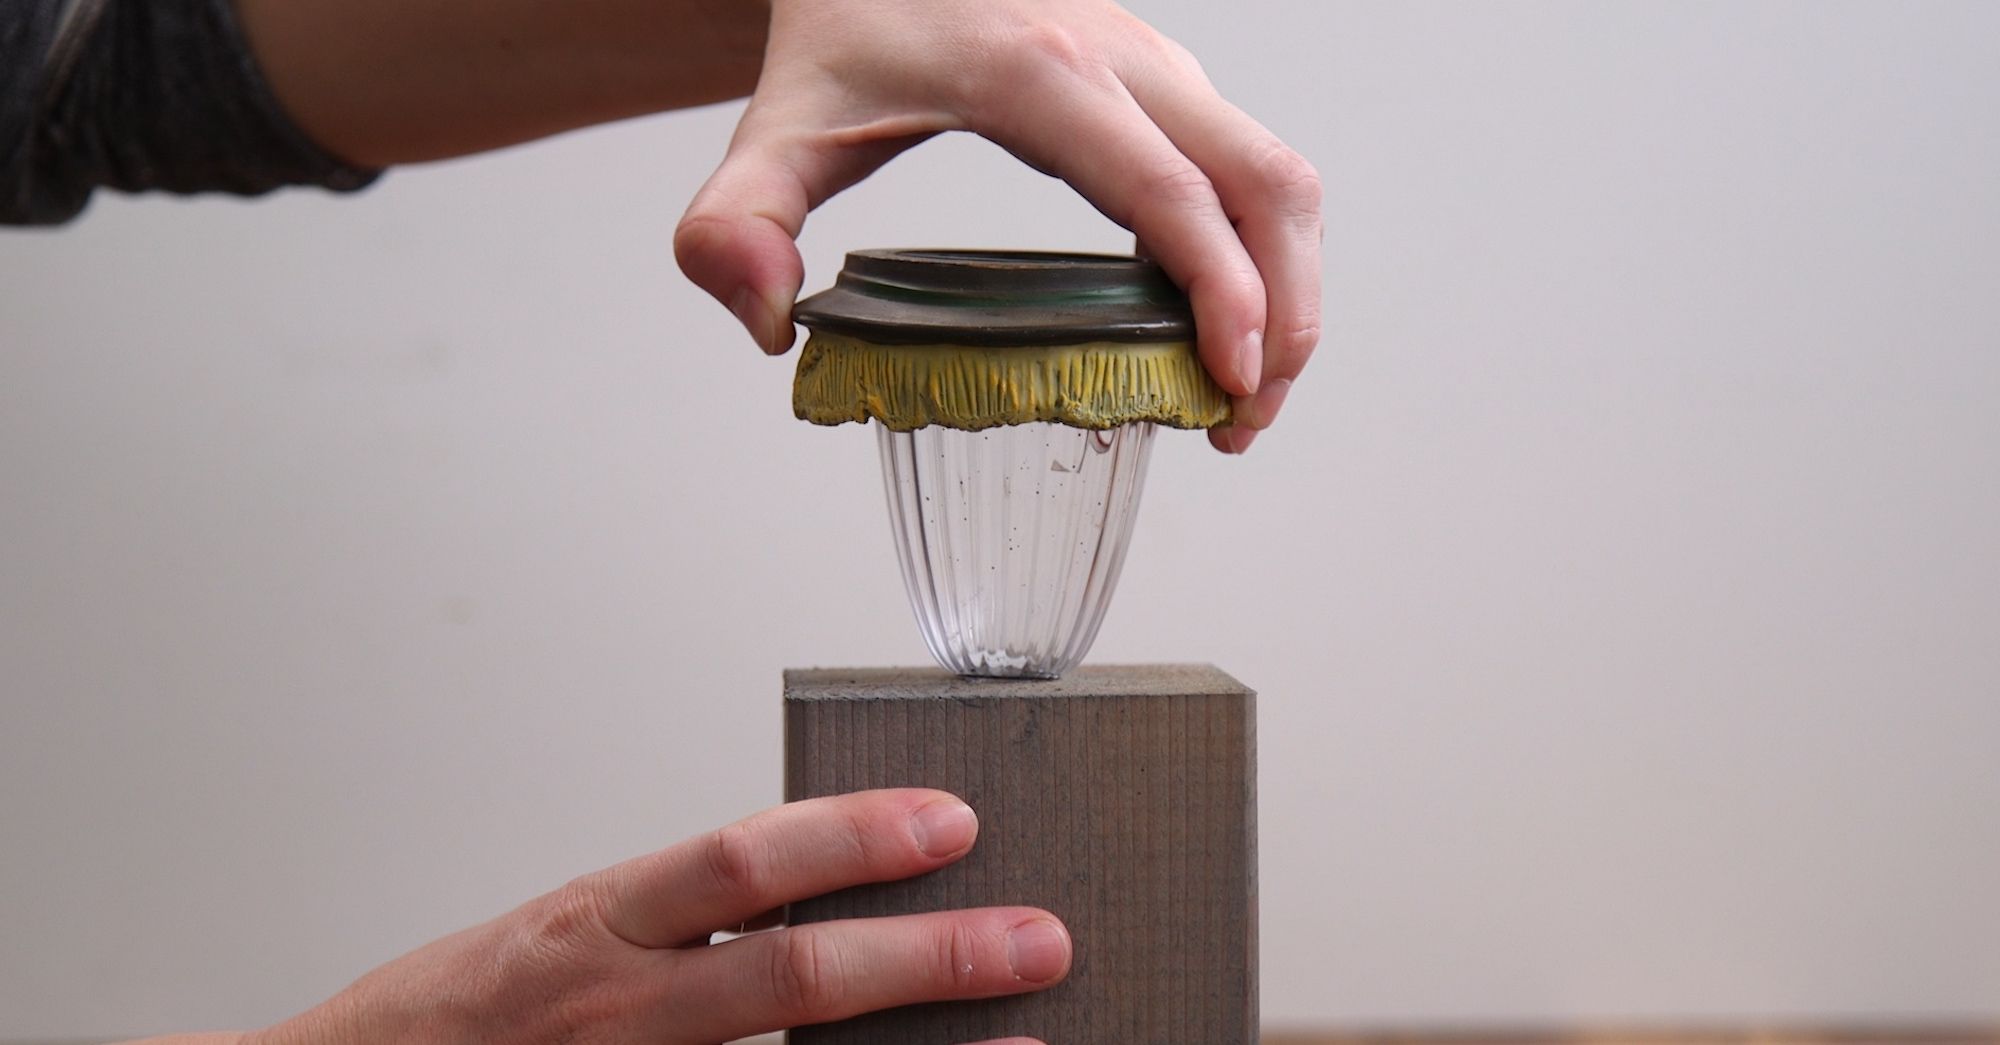
5. Allow the lights to dry in place and then stick them outside to charge.
6. Sit back and watch your backyard come to life with beautiful glowing lights!
Materials
- 1 - 4x4 cedar post
- table saw
- drill bit
- pencil
- measuring tape
- wood stain
- hot glue
- solar lights
Instructions
- Start by measuring out your 4x4 post into three sections, 4", 6", and 8". Than using a table saw cut out the measures sections so that you are left with 3 blocks.
- Next create an "X" on the end of each of the blocks. The center of the "X" is where you will make your drill bit mark that will be used to hold the solar light in place (you will need to drill the hole based on the size of your solar light).
- Once you have your blocks ready, it's time to stain them and then allow them to dry.
- After ensuring the blocks are dry, heat up your glue gun and apply a generous amount inside the drill bit hole, and then stick your solar light inside it (removing the base of the light first).
- Allow the lights to dry in place and then stick them outside to charge.
- Sit back and watch your backyard come to life with beautiful glowing lights!
