
I'm not a super crafty person. I'll only make things if they're easy, give you a unique finished product, and if I can find all the items without a lot of hassle.
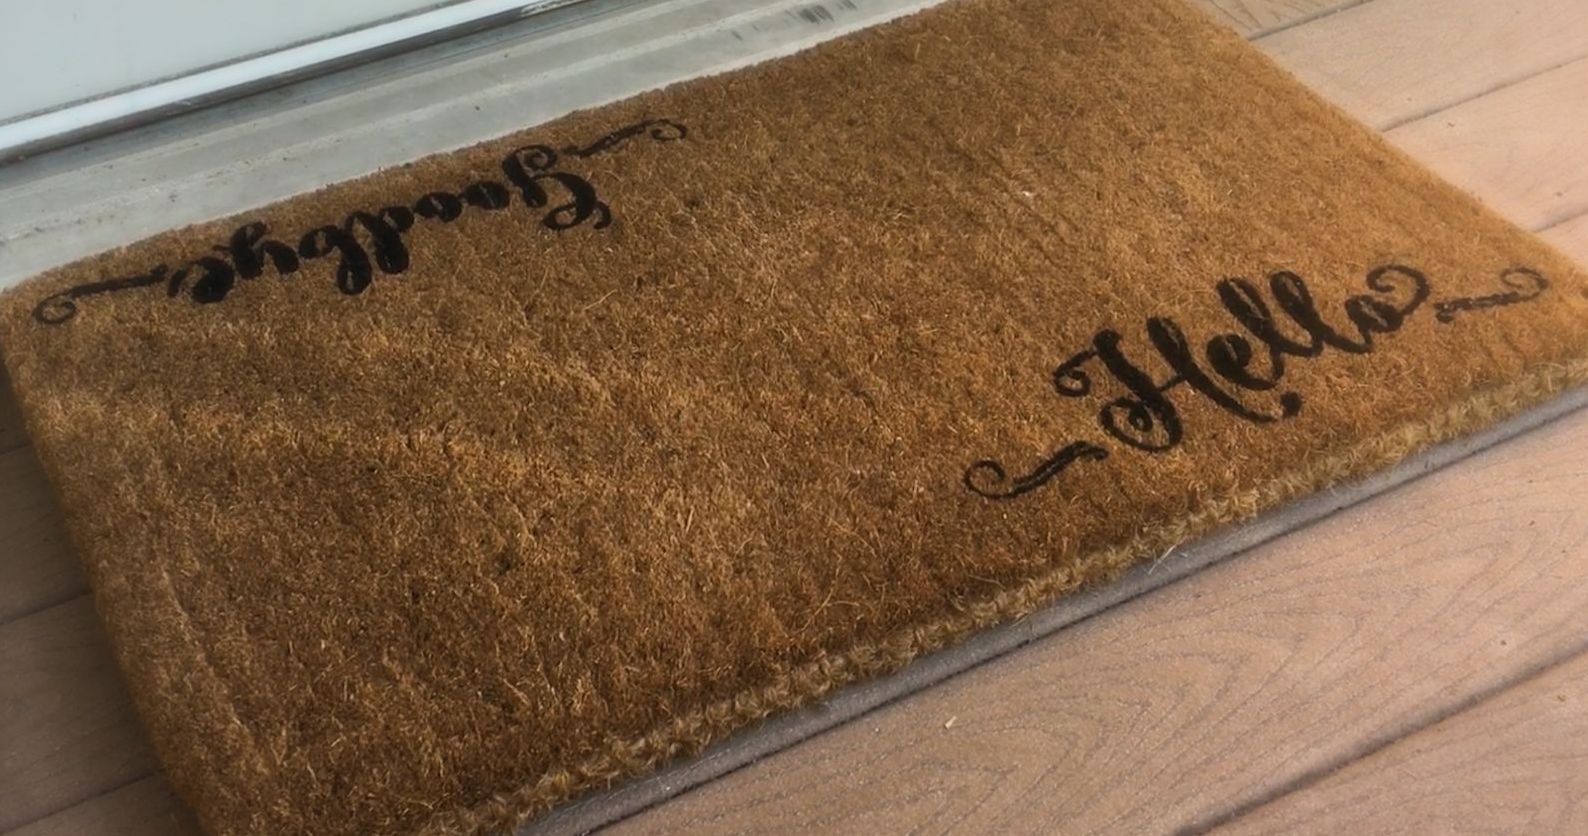
This Personalized Door Mat checks all the boxes for me when it comes to crafting. It's easy, doesn't require a lot of materials or artistic skill, and I genuinely like the finished product!
I bought the plain doormat from the store (you can also order one online) and I used a stencil and black acrylic paint to add the words. No crazy or complicated steps! Once it's dry it's ready to put outside. I've had so many compliments on the mat since I made it, and people are so surprised when I tell them it was a DIY project - not from a store.
If you're feeling confident, feel free to experiment with your designs. You can get different stencils (or create your own), or you can use tape to make fun geometrical designs. It's really up to you! Remember, it's all about having fun.
Looking for more home decor ideas? Check these ones out!
Dollar Store Rubber Mat Wall Art
Scroll down to see how to make this custom doormat.
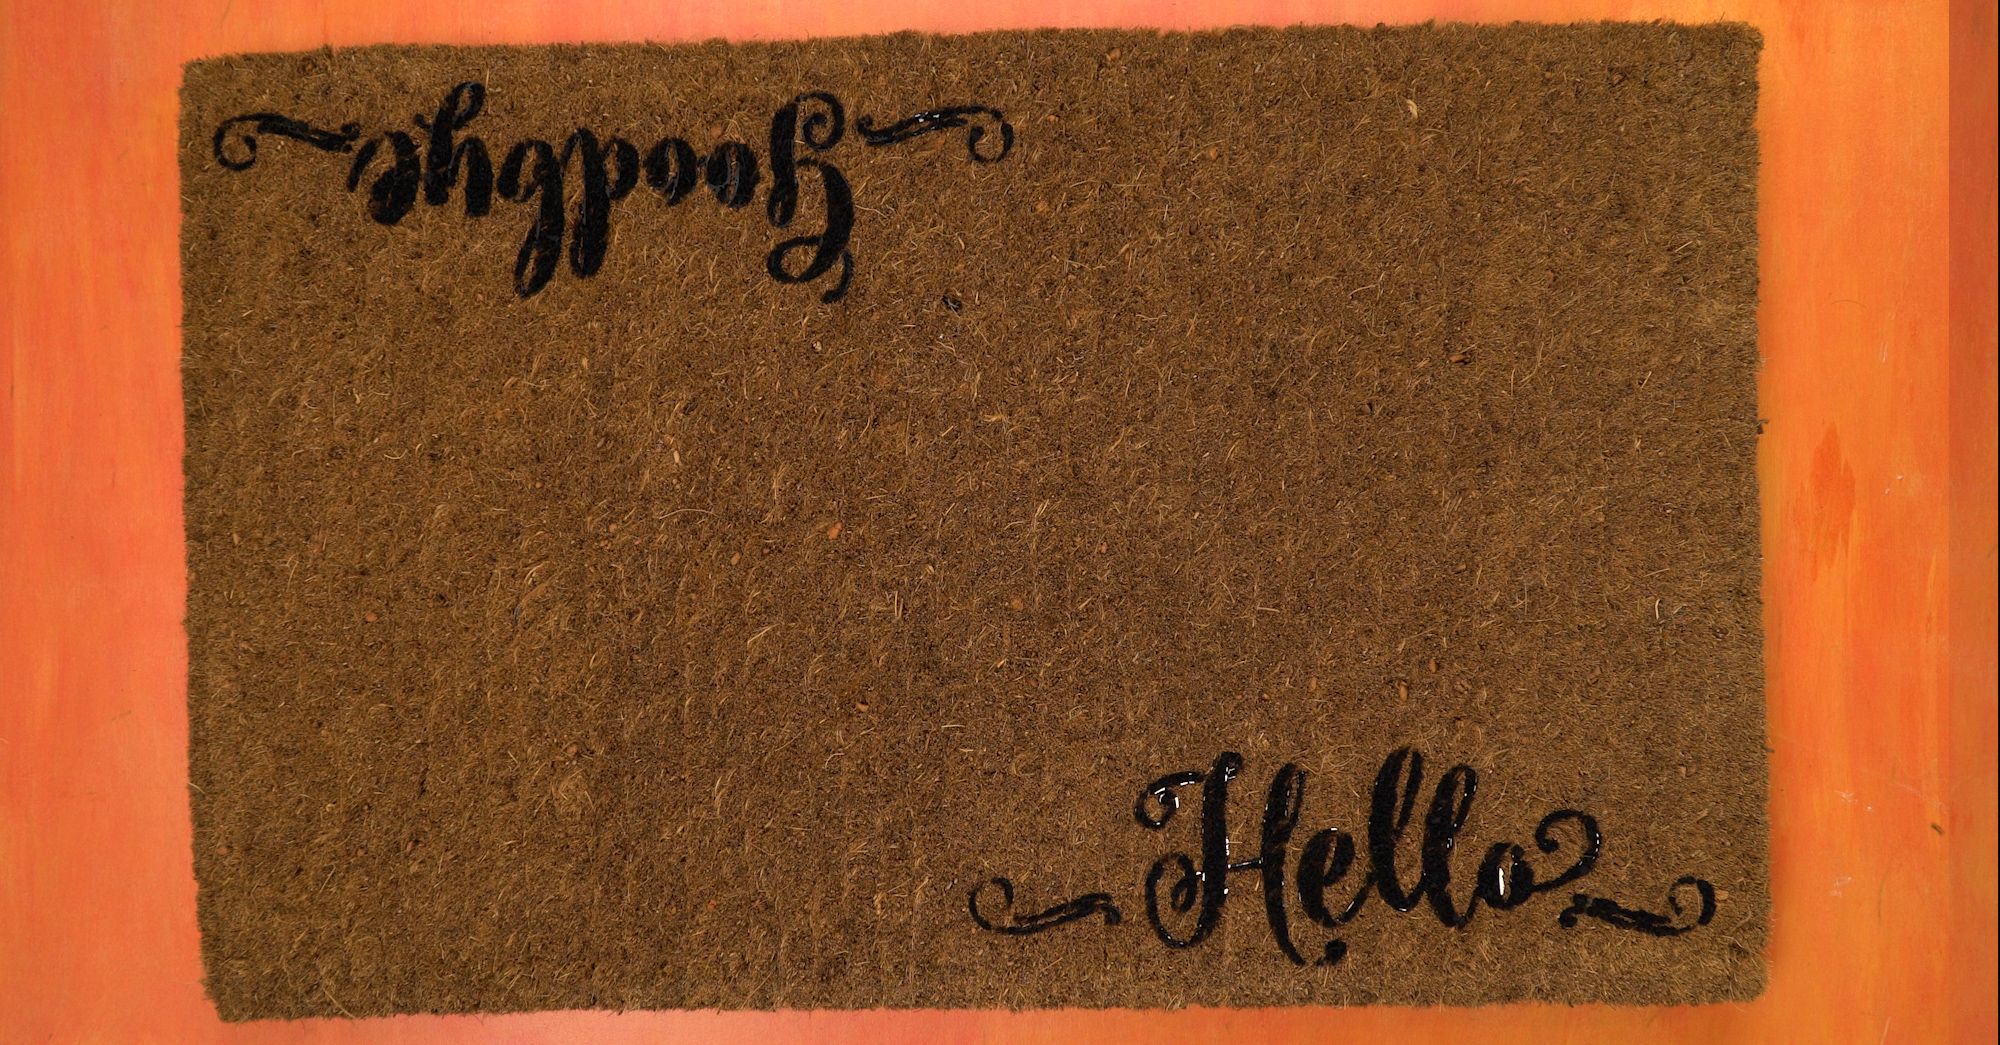
Take your blank doormat and pin your 'hello' stencil to the lower left corner.
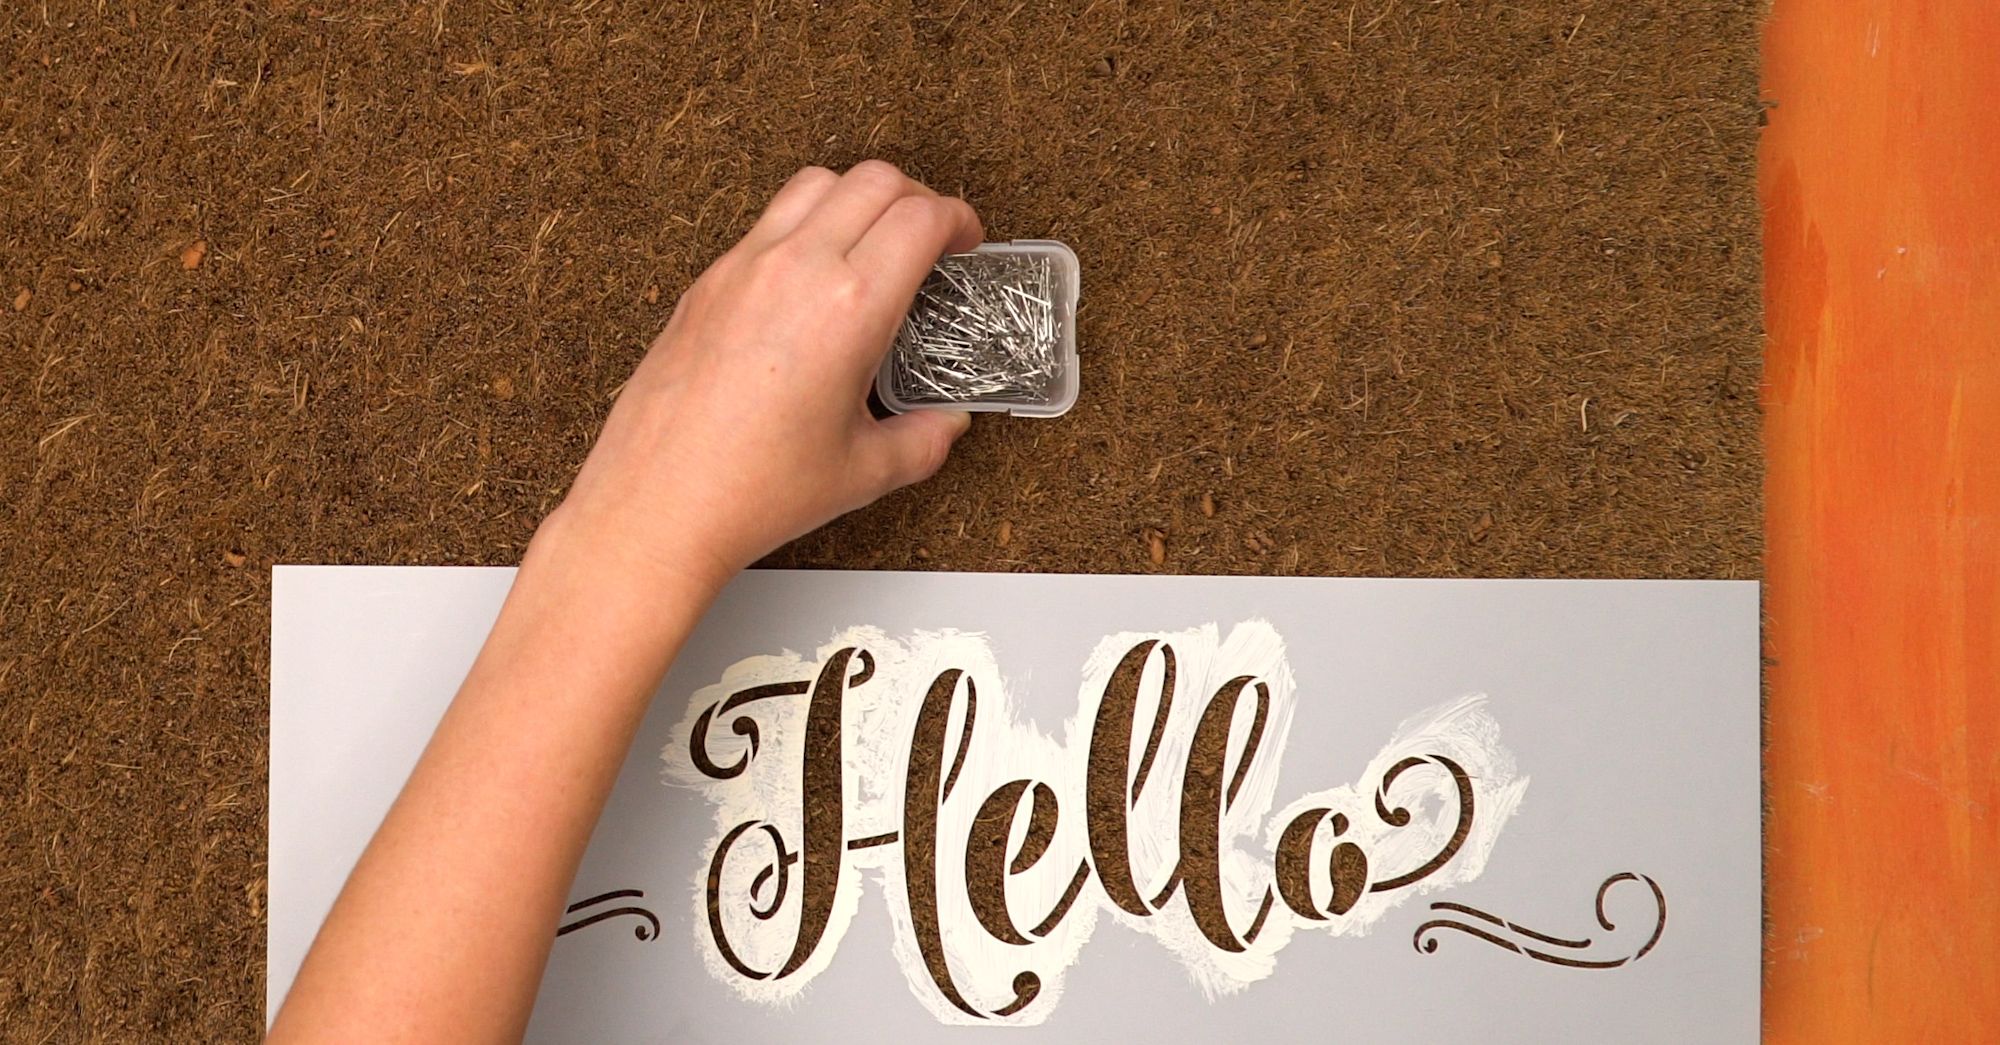
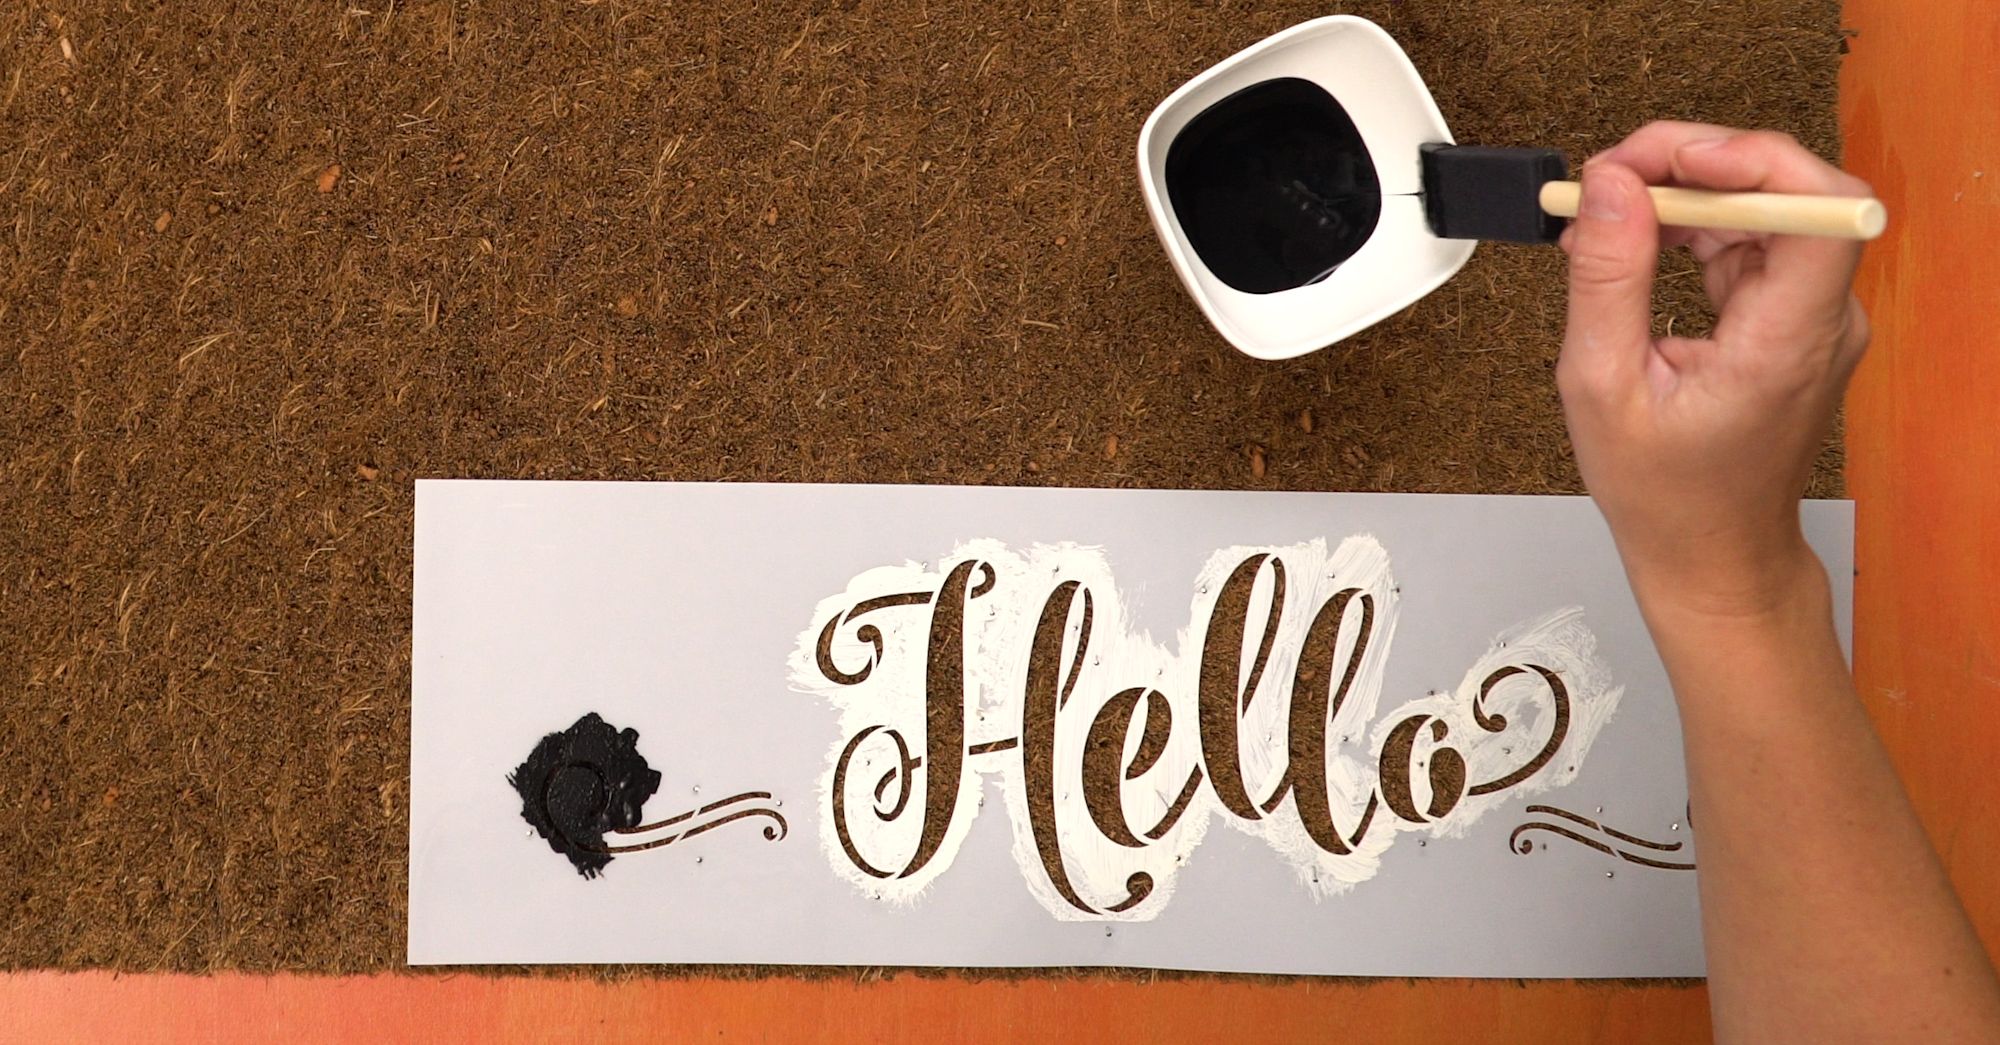
Paint your stencil using the black acrylic paint (or whatever color you want!).
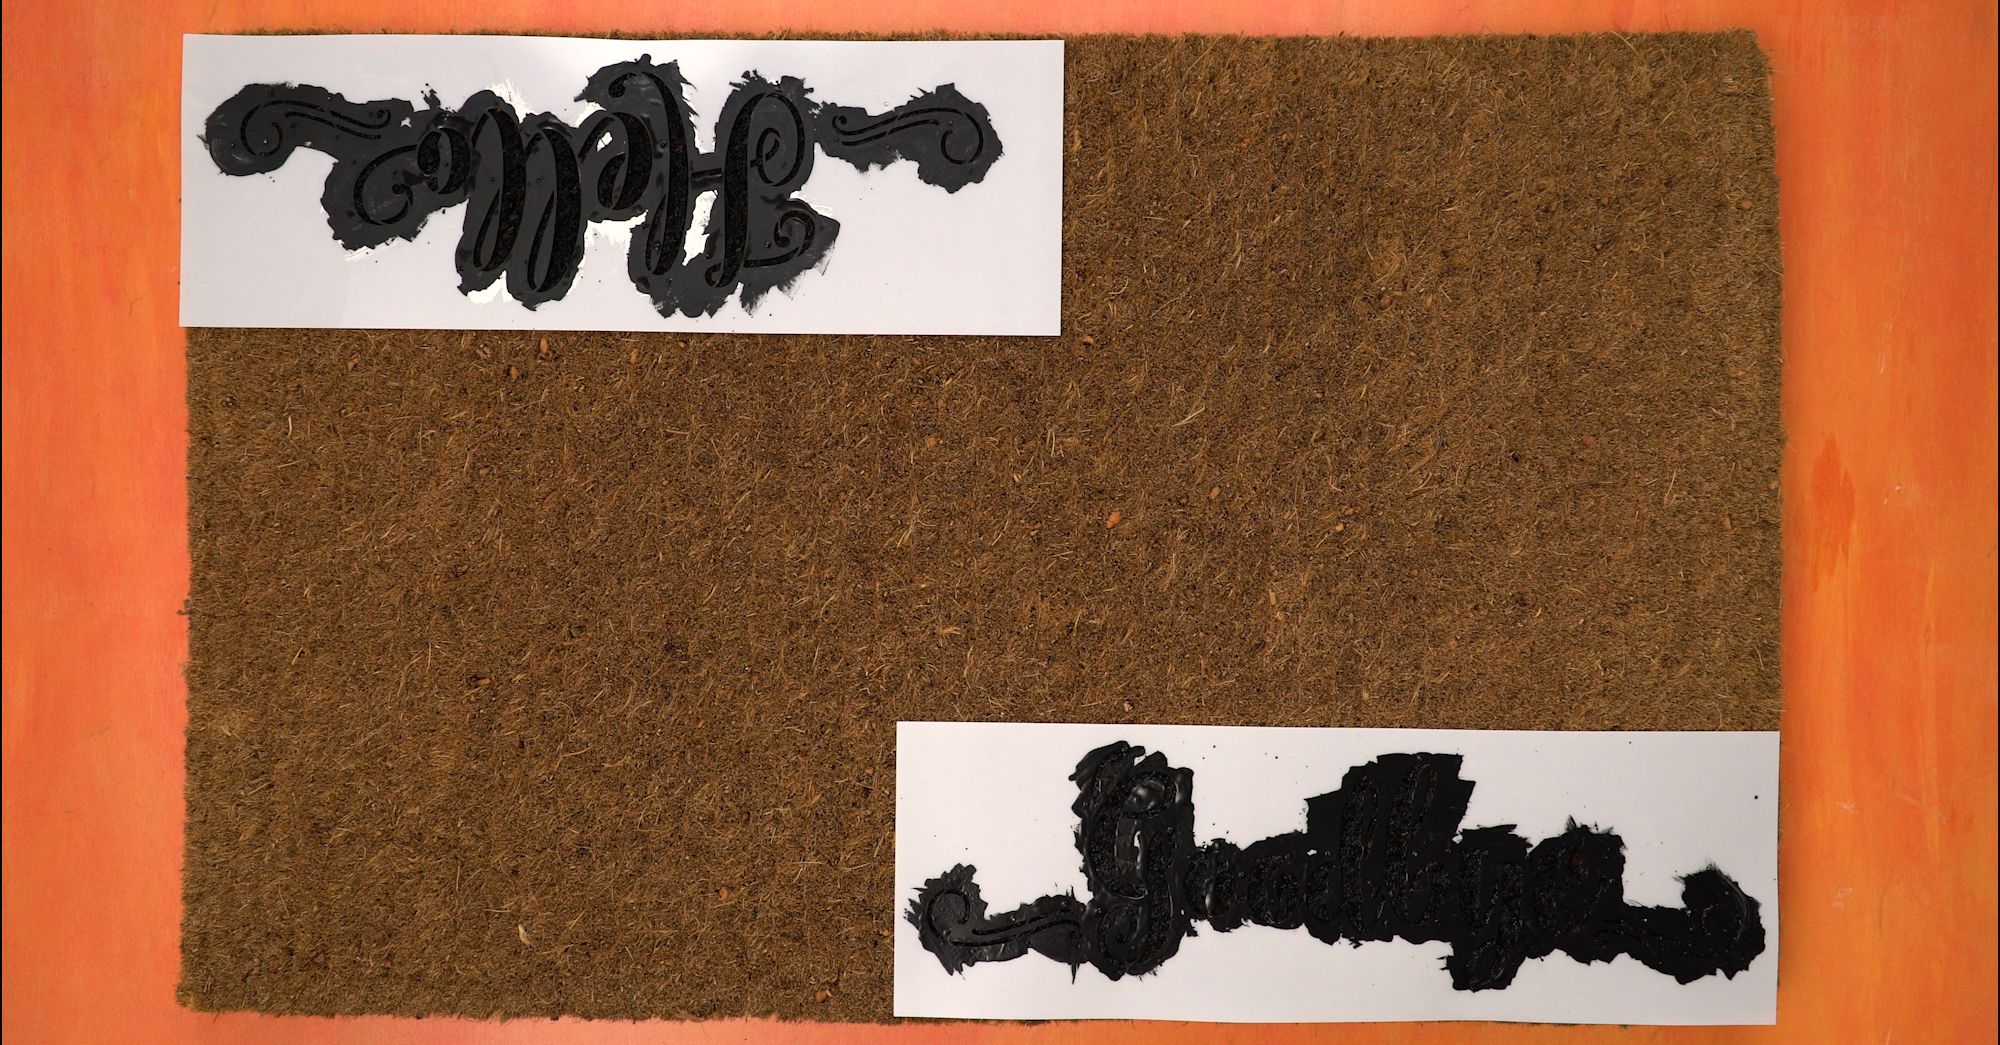
Next you're going to add your 'goodbye' stencil to the upper right hand corner of the mat.
Add the paint like you did with the 'hello' stencil.
Let the paint dry completely (overnight is ideal).
Once the paint is dry, remove the pins and the stencils to reveal your beautifully painted letters underneath!
Your mat is now ready to be used! Don't be surprised if all your guests wonder where you bought it.
Materials
- Black acrylic paint
- Foam brush
- Stencils
- Blank door mat
Directions
- Take your blank doormat and pin your 'hello' stencil to the lower left corner.
- Paint your stencil using the black acrylic paint (or whatever color you want!).
- Next you're going to add your 'goodbye' stencil to the upper right hand corner of the mat.
- Add the paint like you did with the 'hello' stencil.
- Let the paint dry completely (overnight is ideal).
- Once the paint is dry, remove the pins and the stencils to reveal your beautifully painted letters underneath!
Do you know someone who would love this unique doormat DIY? Make sure to share this with them!
Watch our video below that shows you how to make this awesome Personalized Doormat.
